During my first co-op semester, I purchased a Creality Ender 3 and have been using it for a variety of functional and decorative prints in PLA and PETG. Designing done in solidworks, slicing performed in Ultimaker Cura.
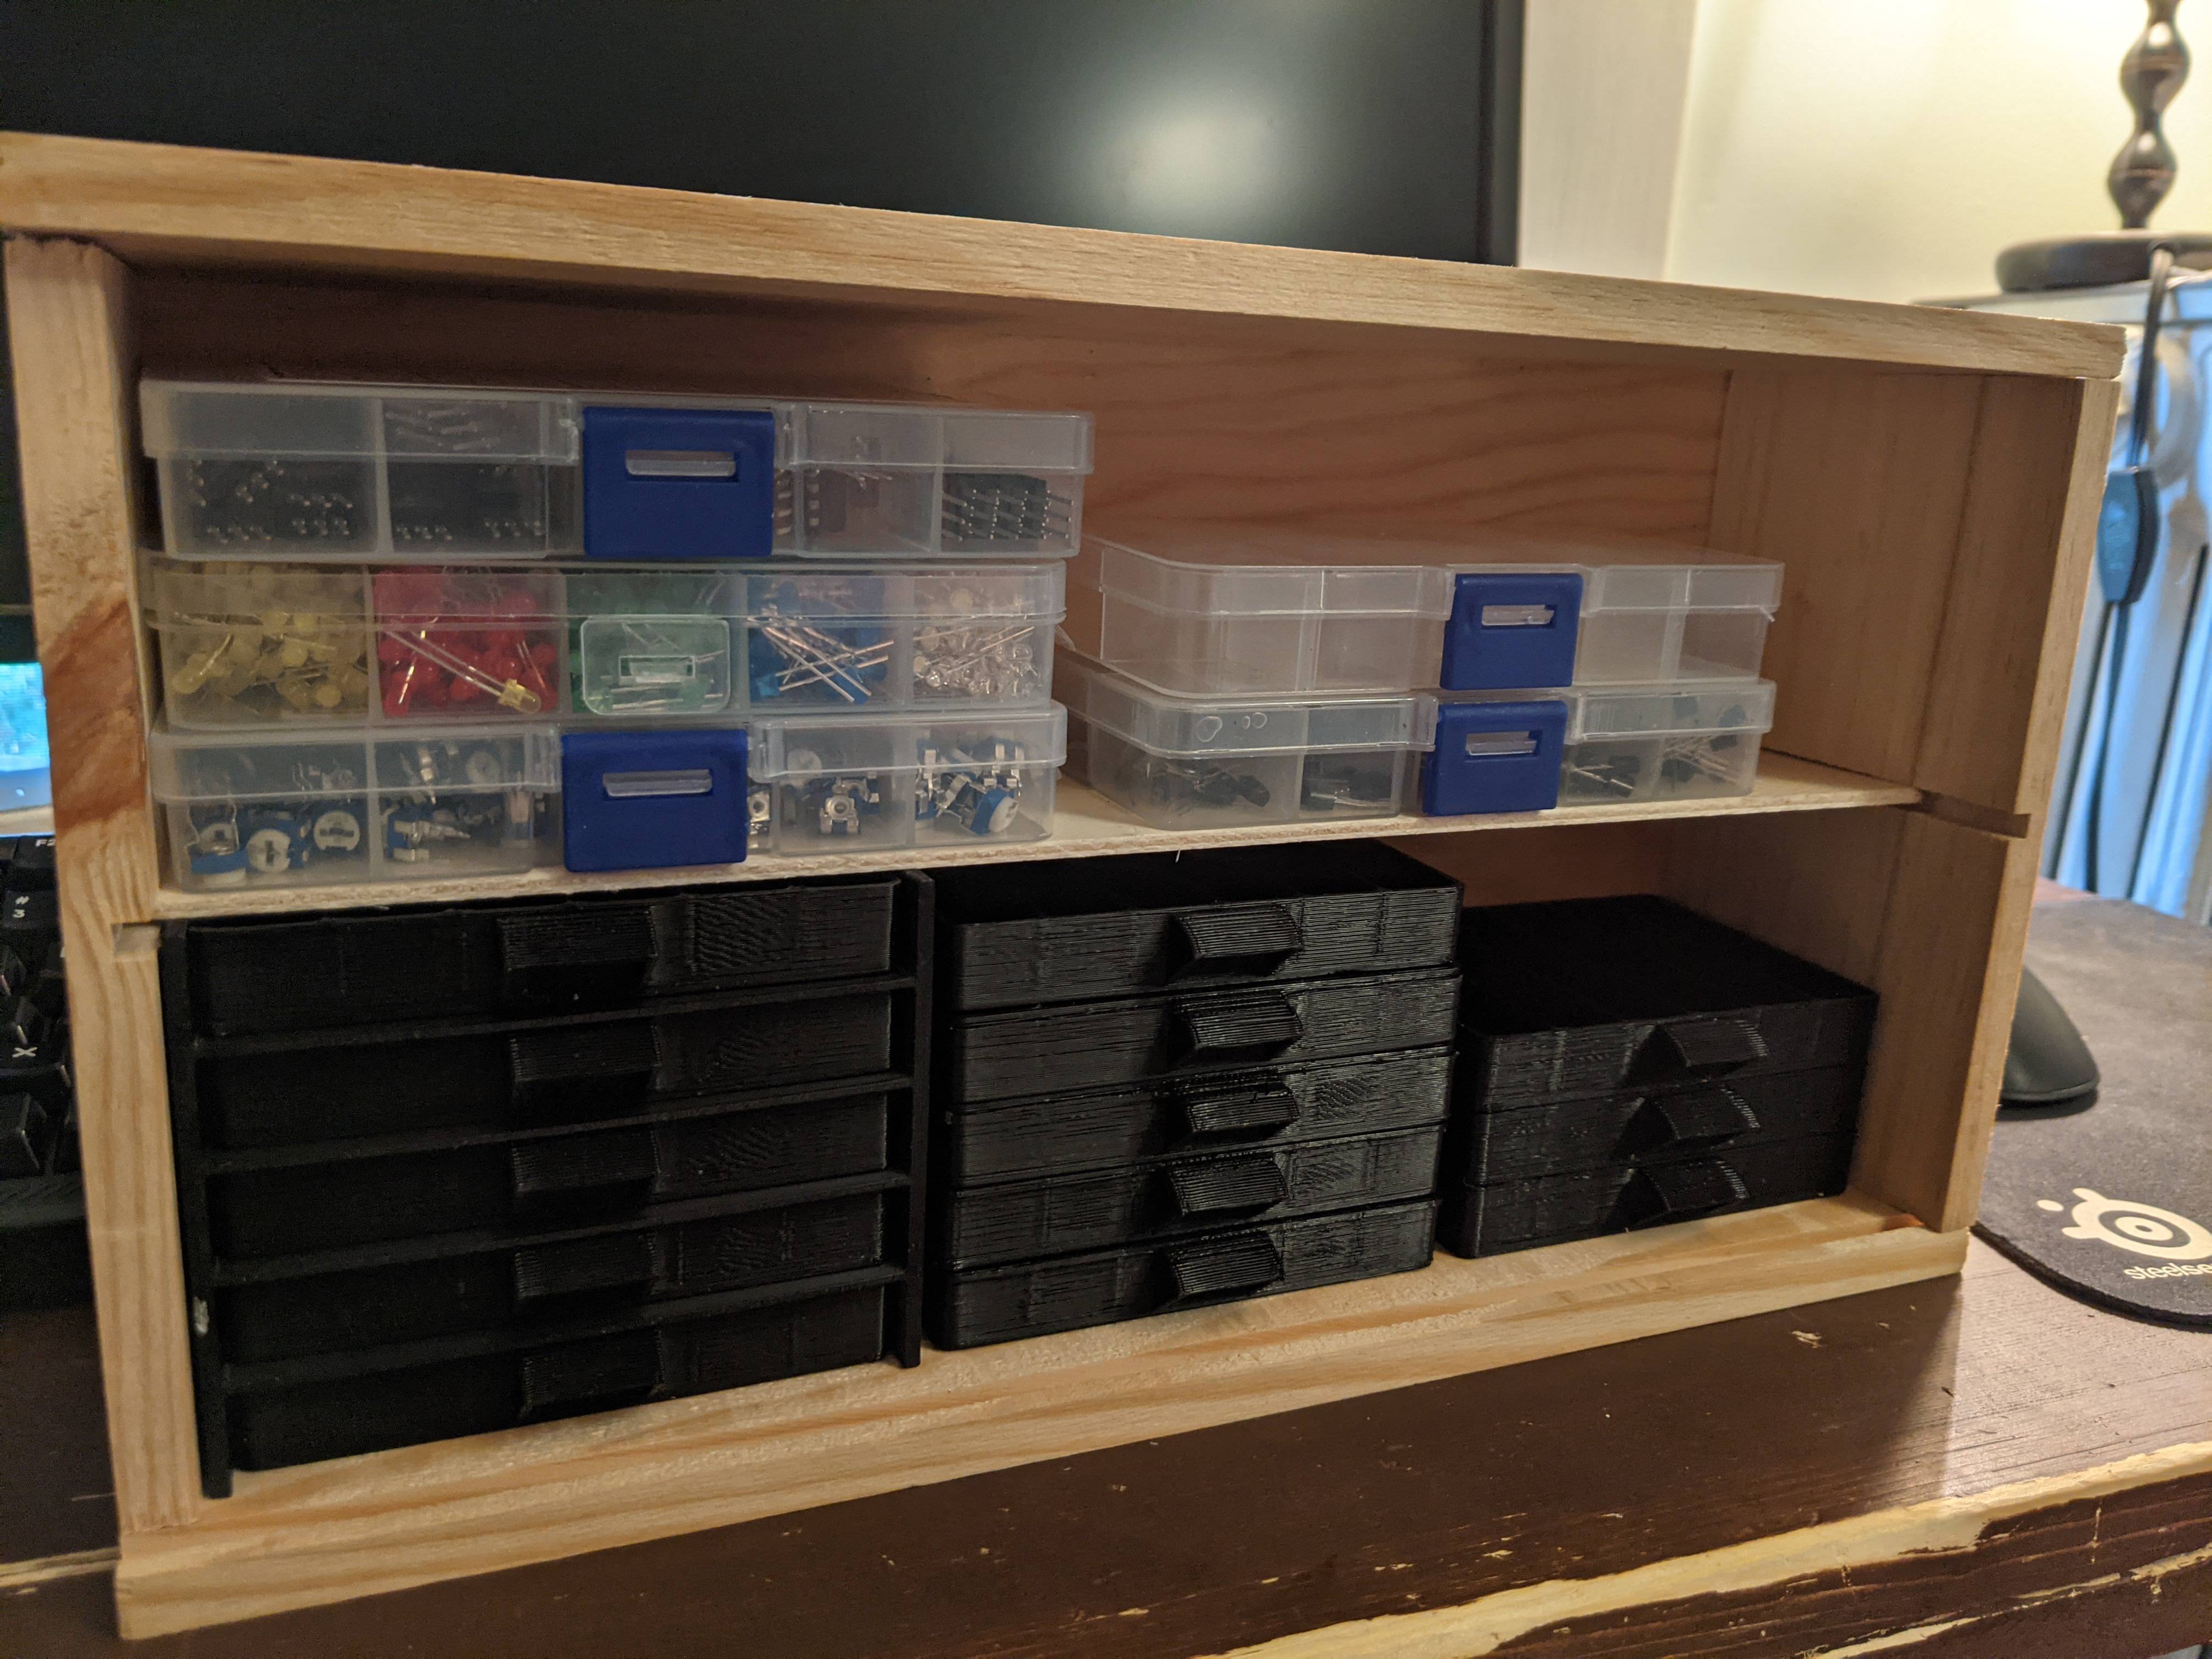
A set of drawers and dividers used to efficiently store >120 different values of resistors.
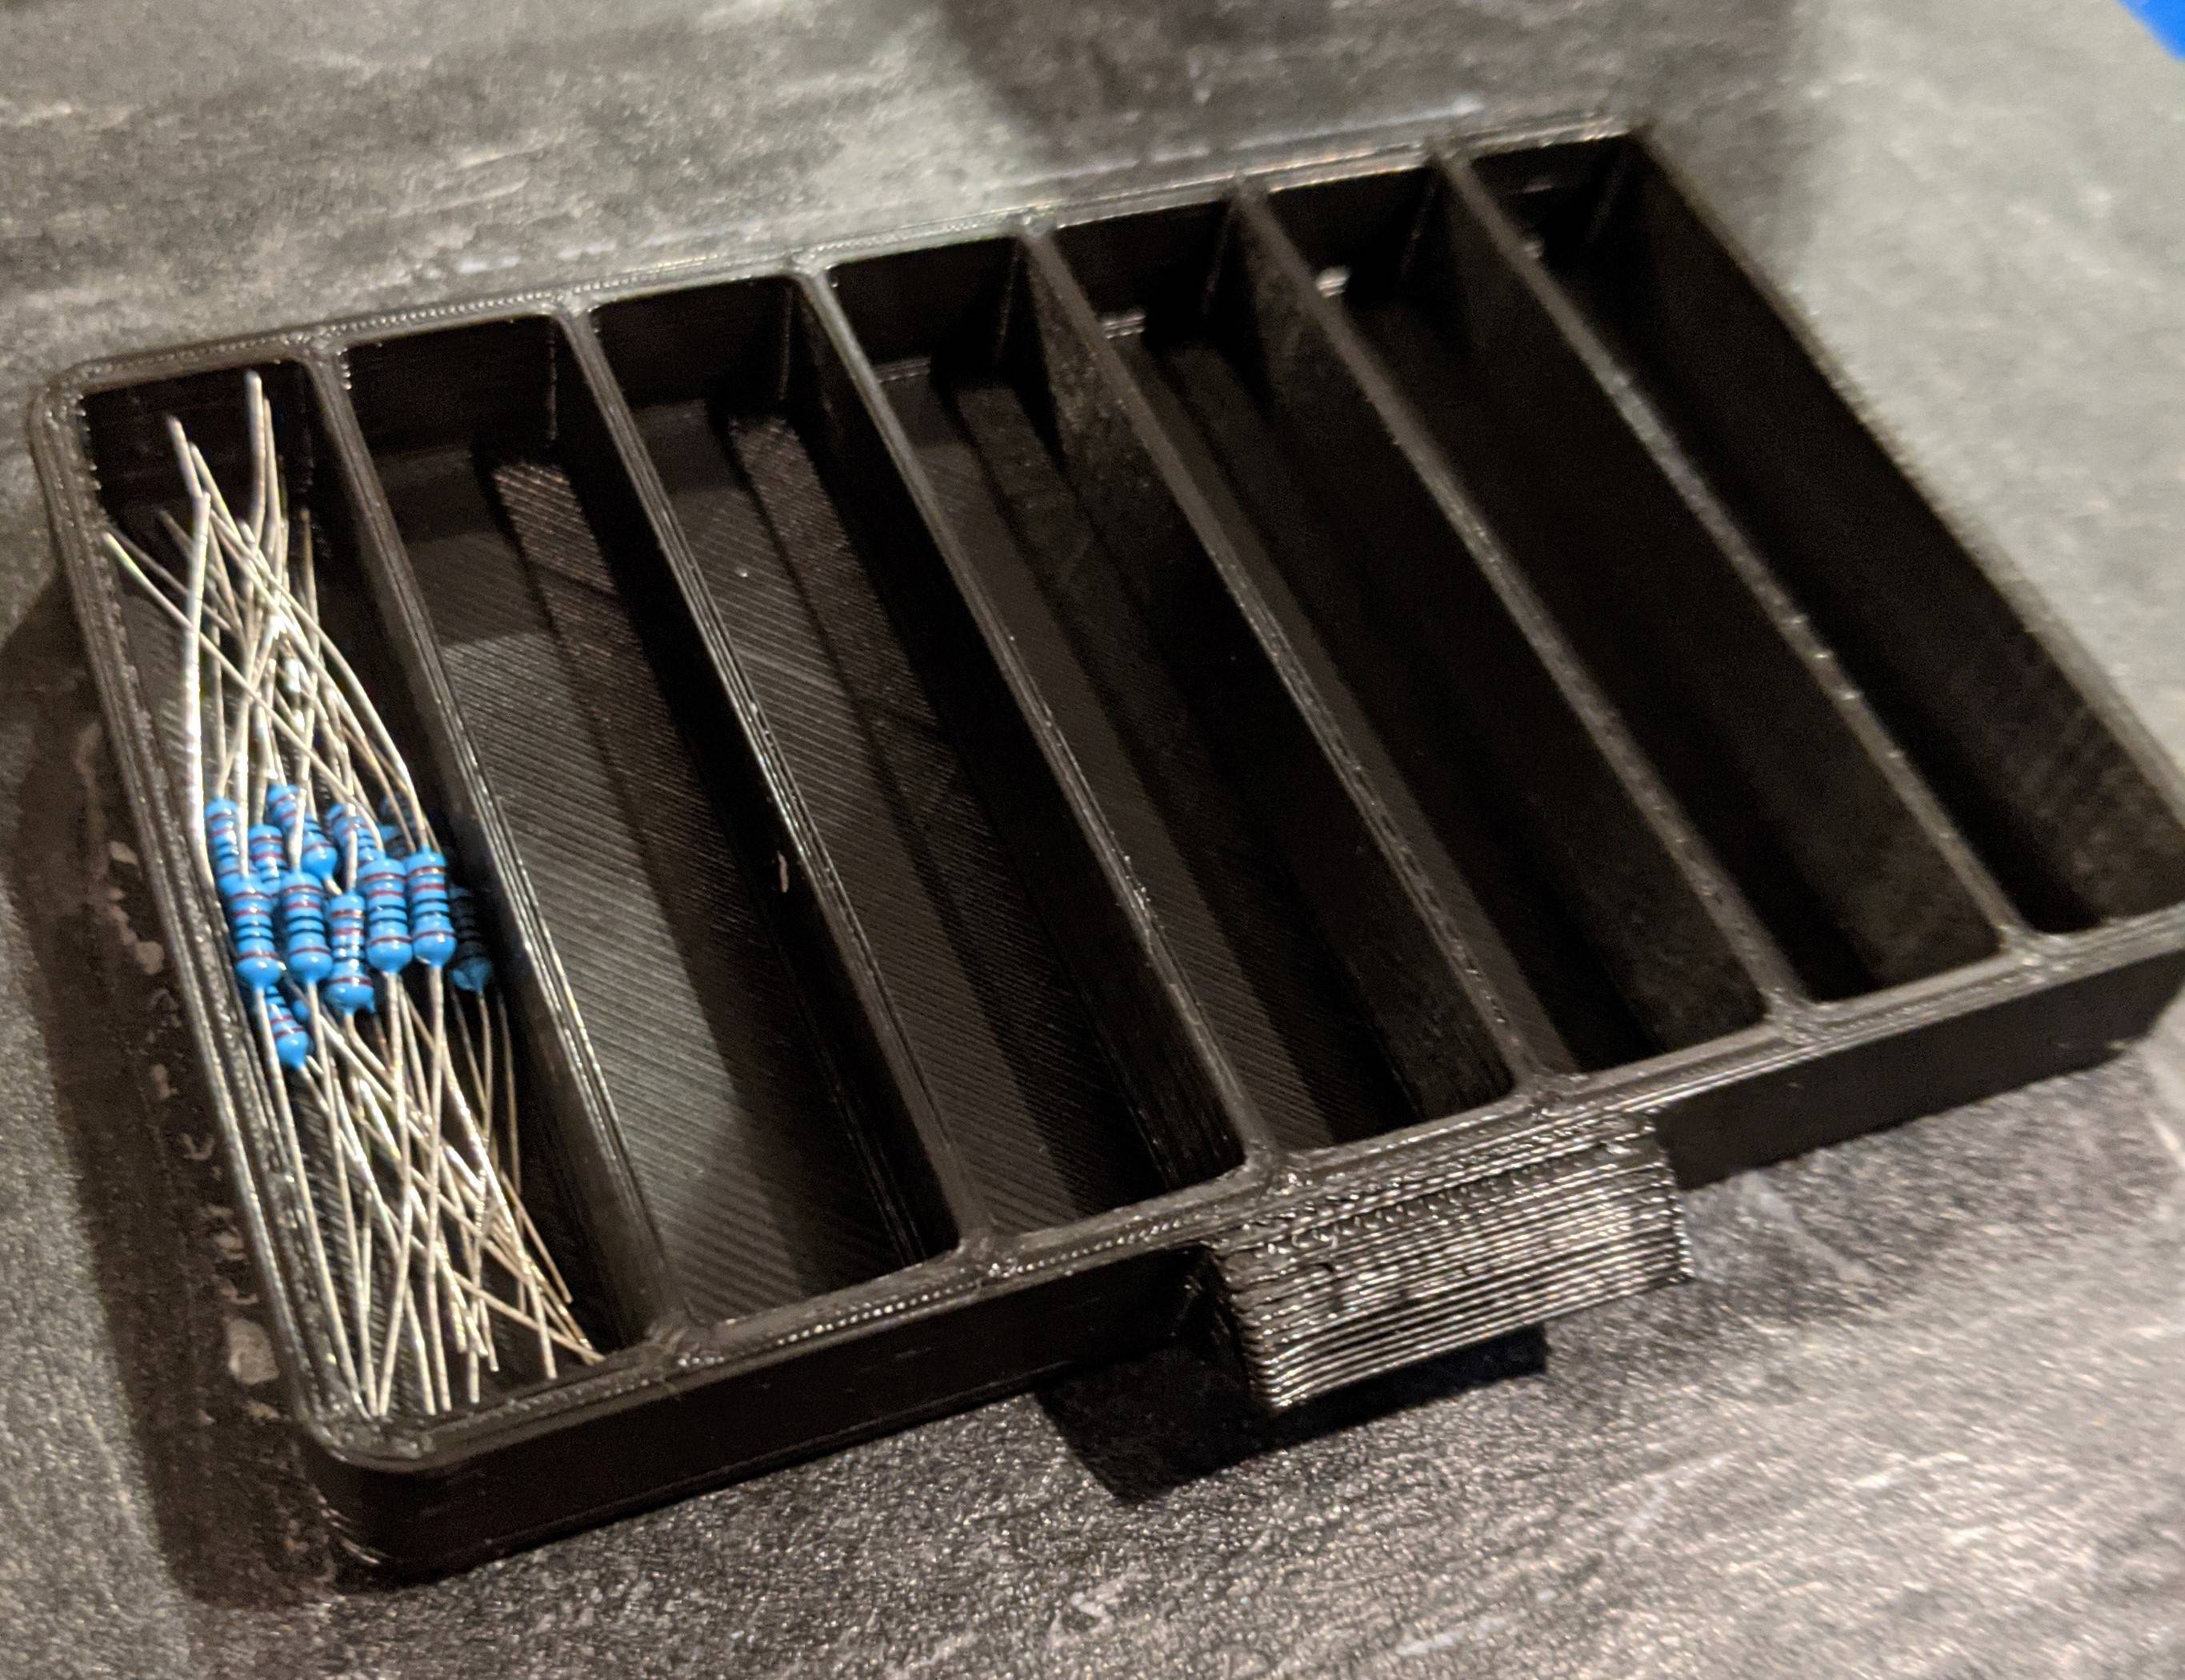
My first drawer print. The resitors fit fairly well, but I later changed each compartment to be deeper and wider, but only did 6 instead of 7 compartments per drawer, since it made more sense for the organisation of the resistor values.
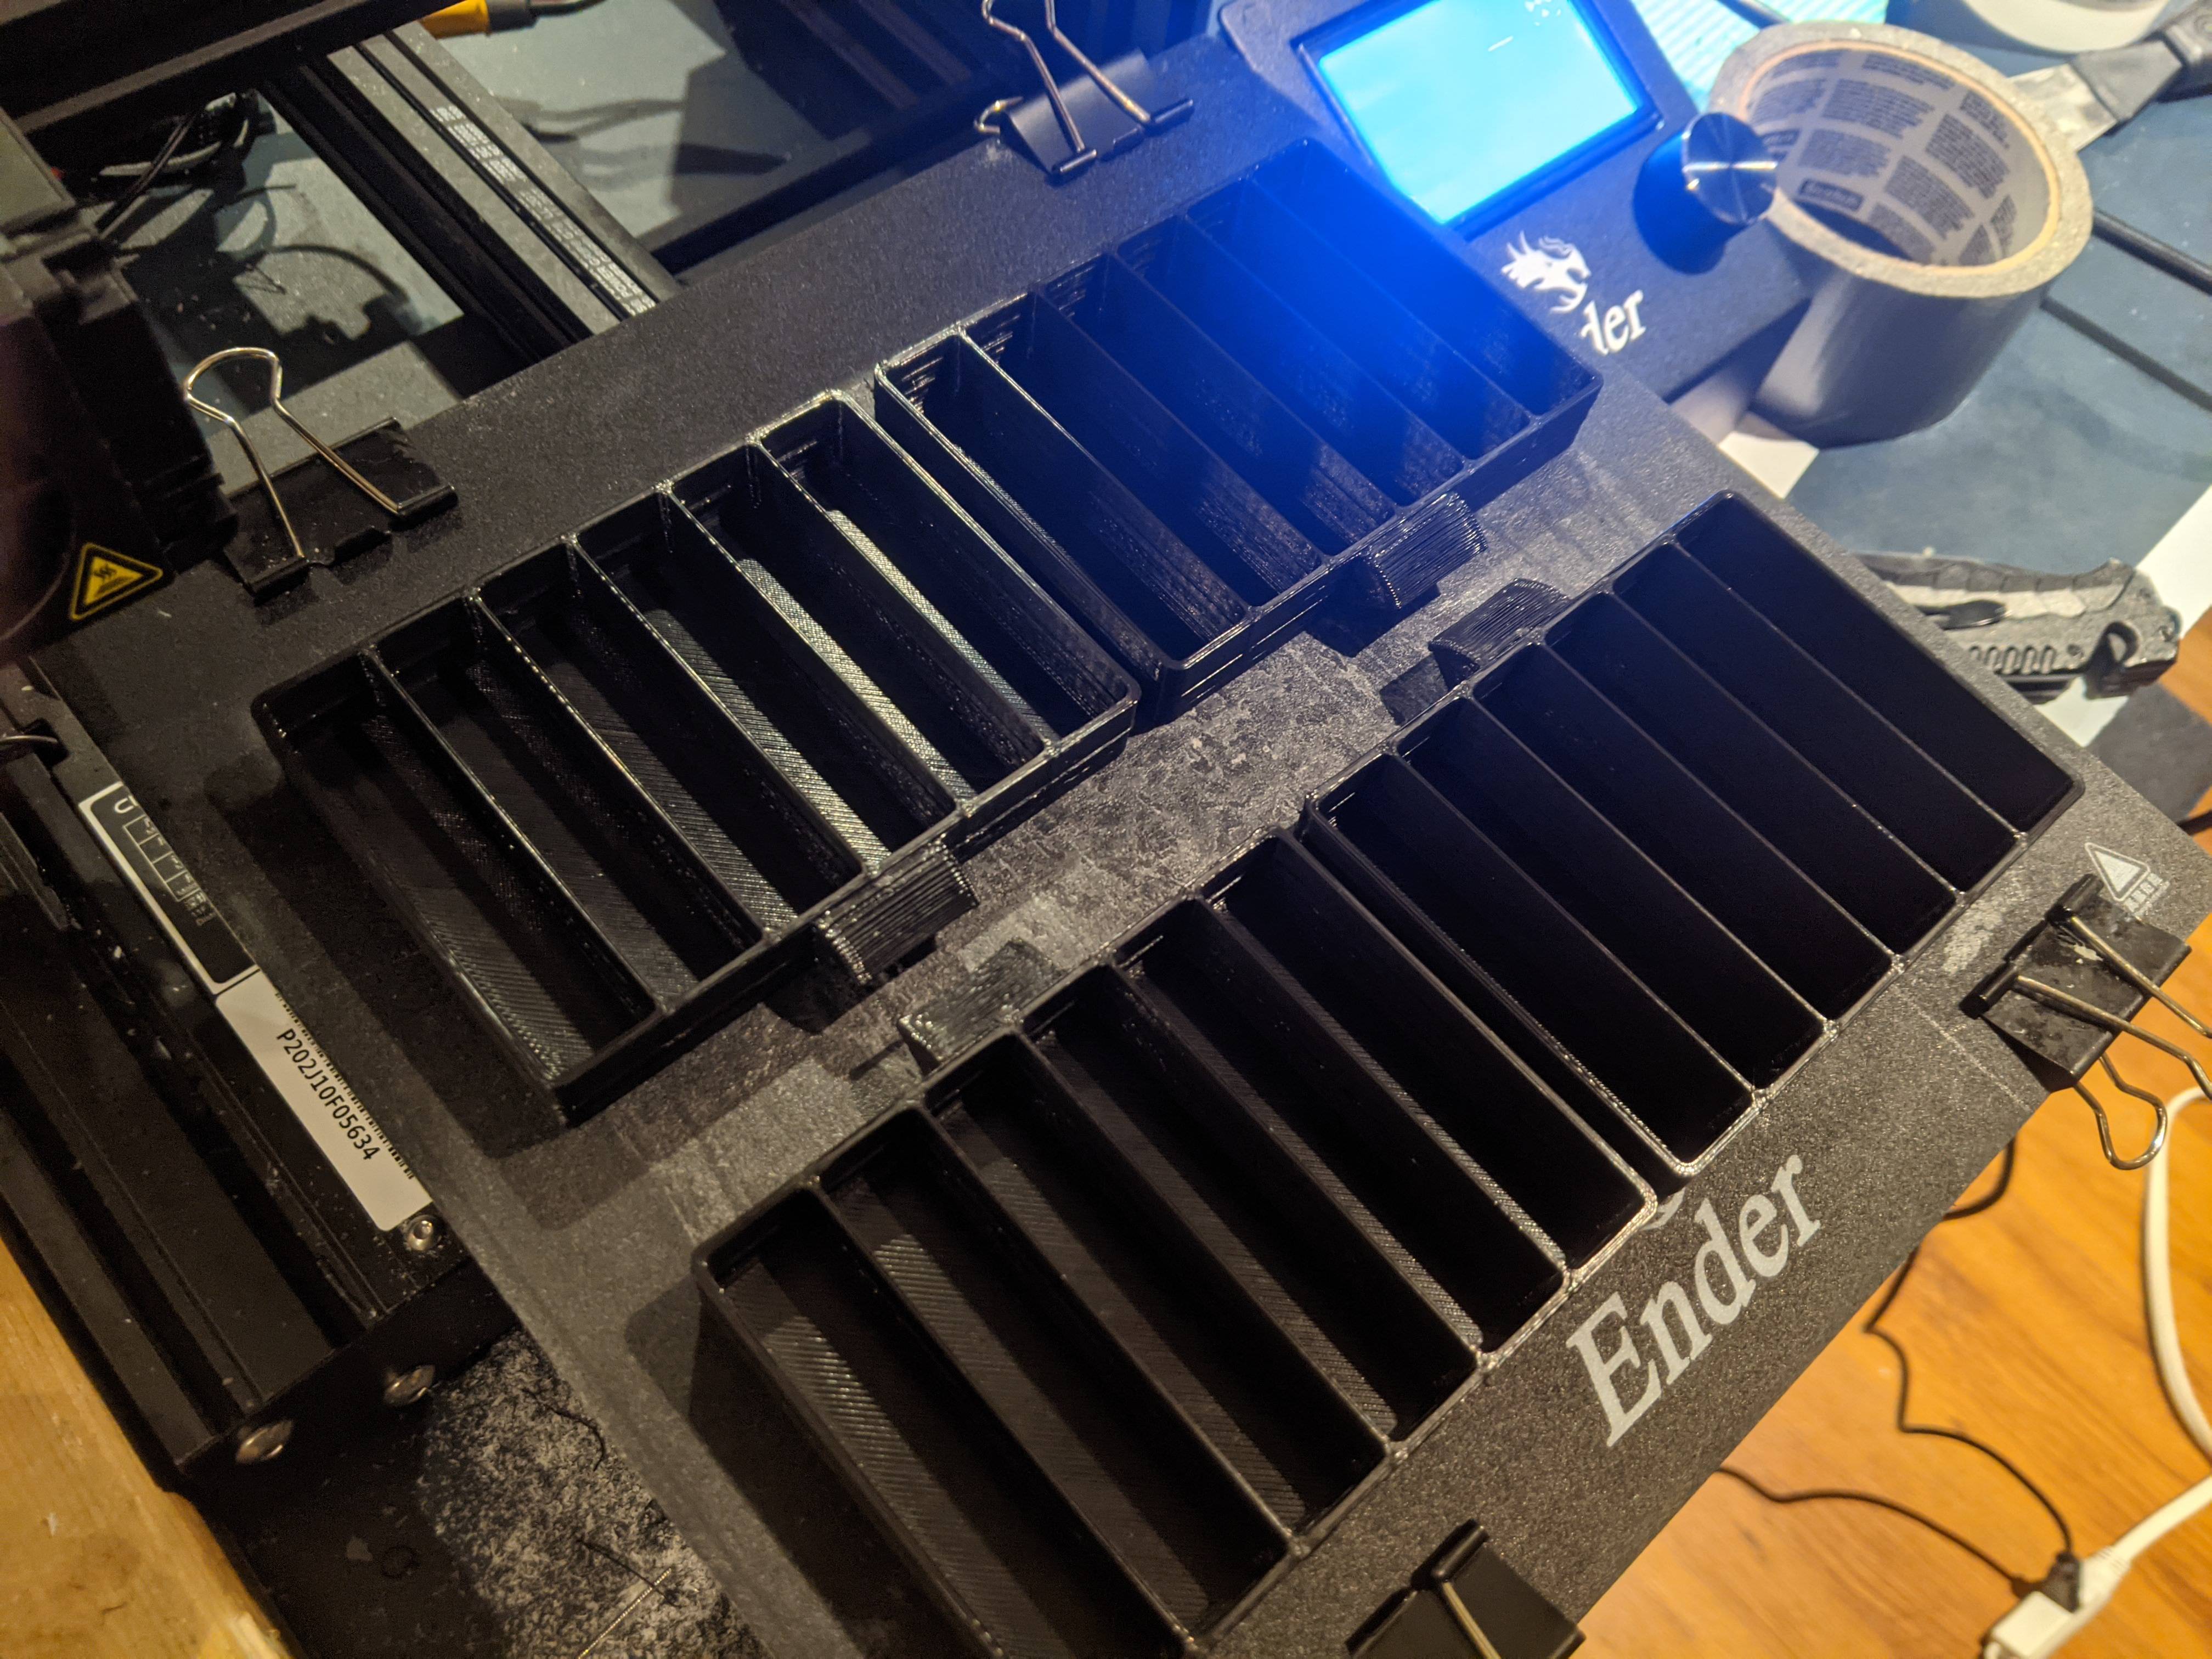
Once the design was finalised, I started printing 4 wdrawers at a time to save labor and time.
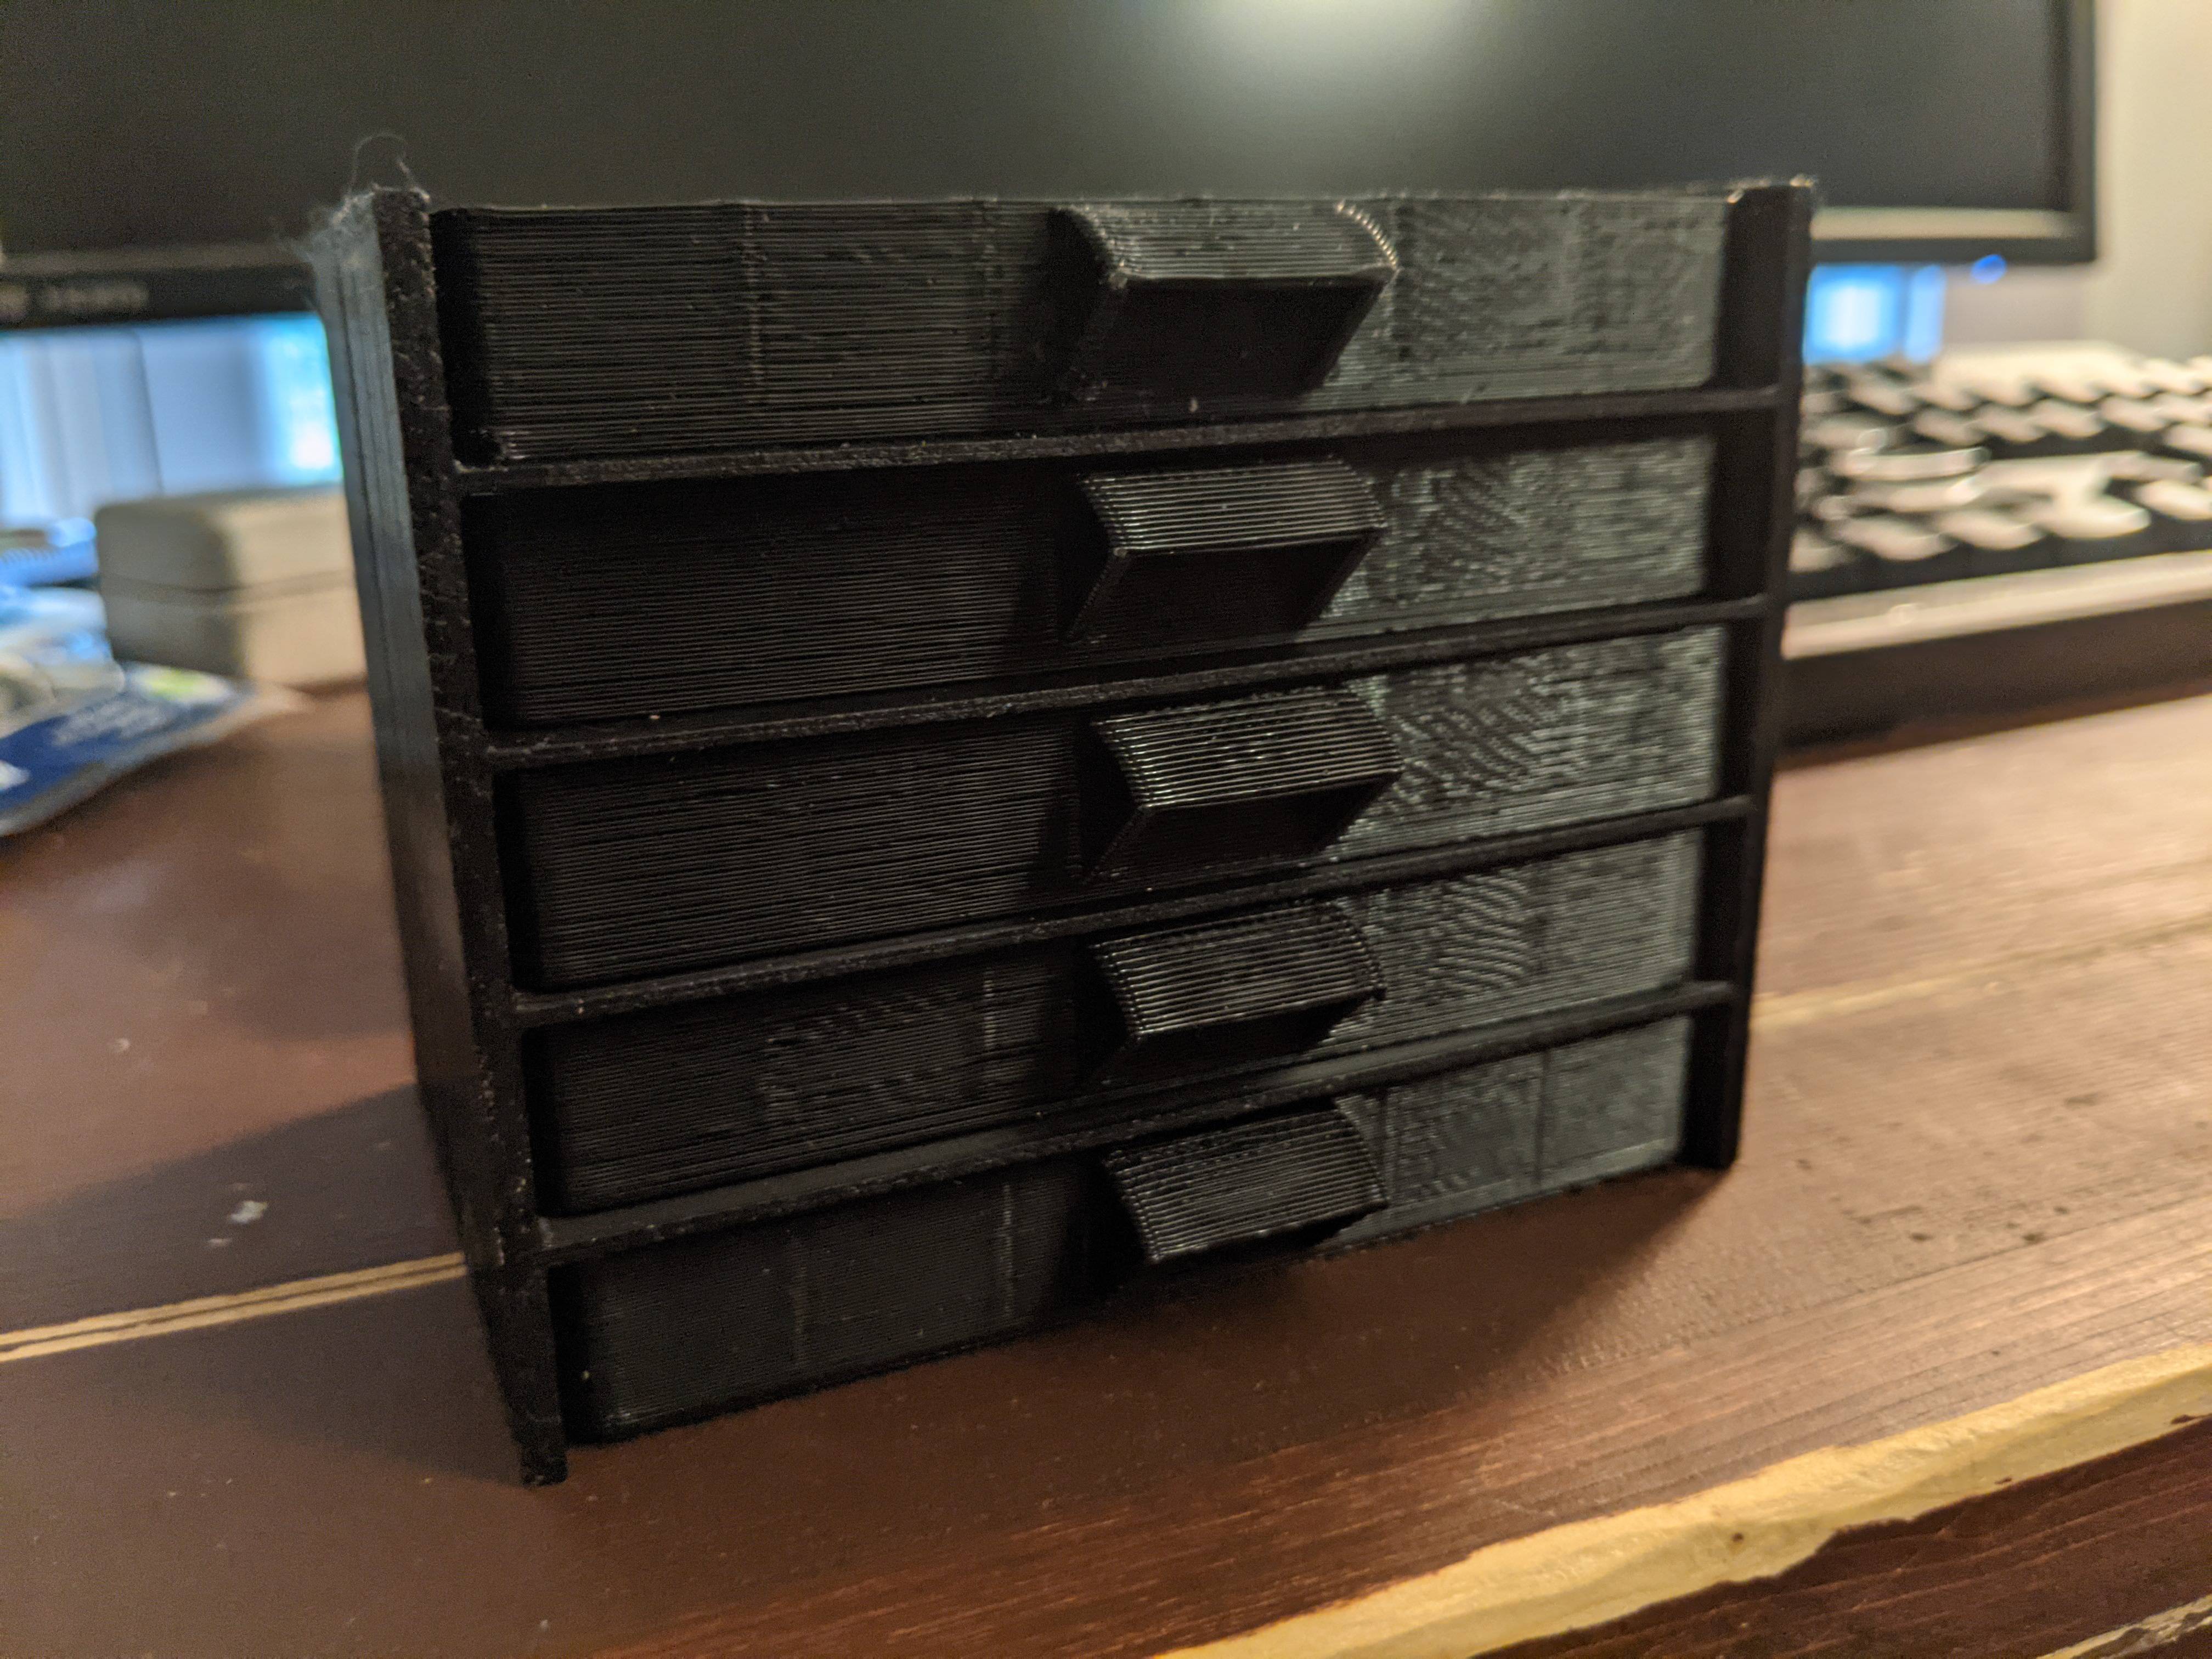
A single column of drawers in their divider. They slide easily in and out of the slots.
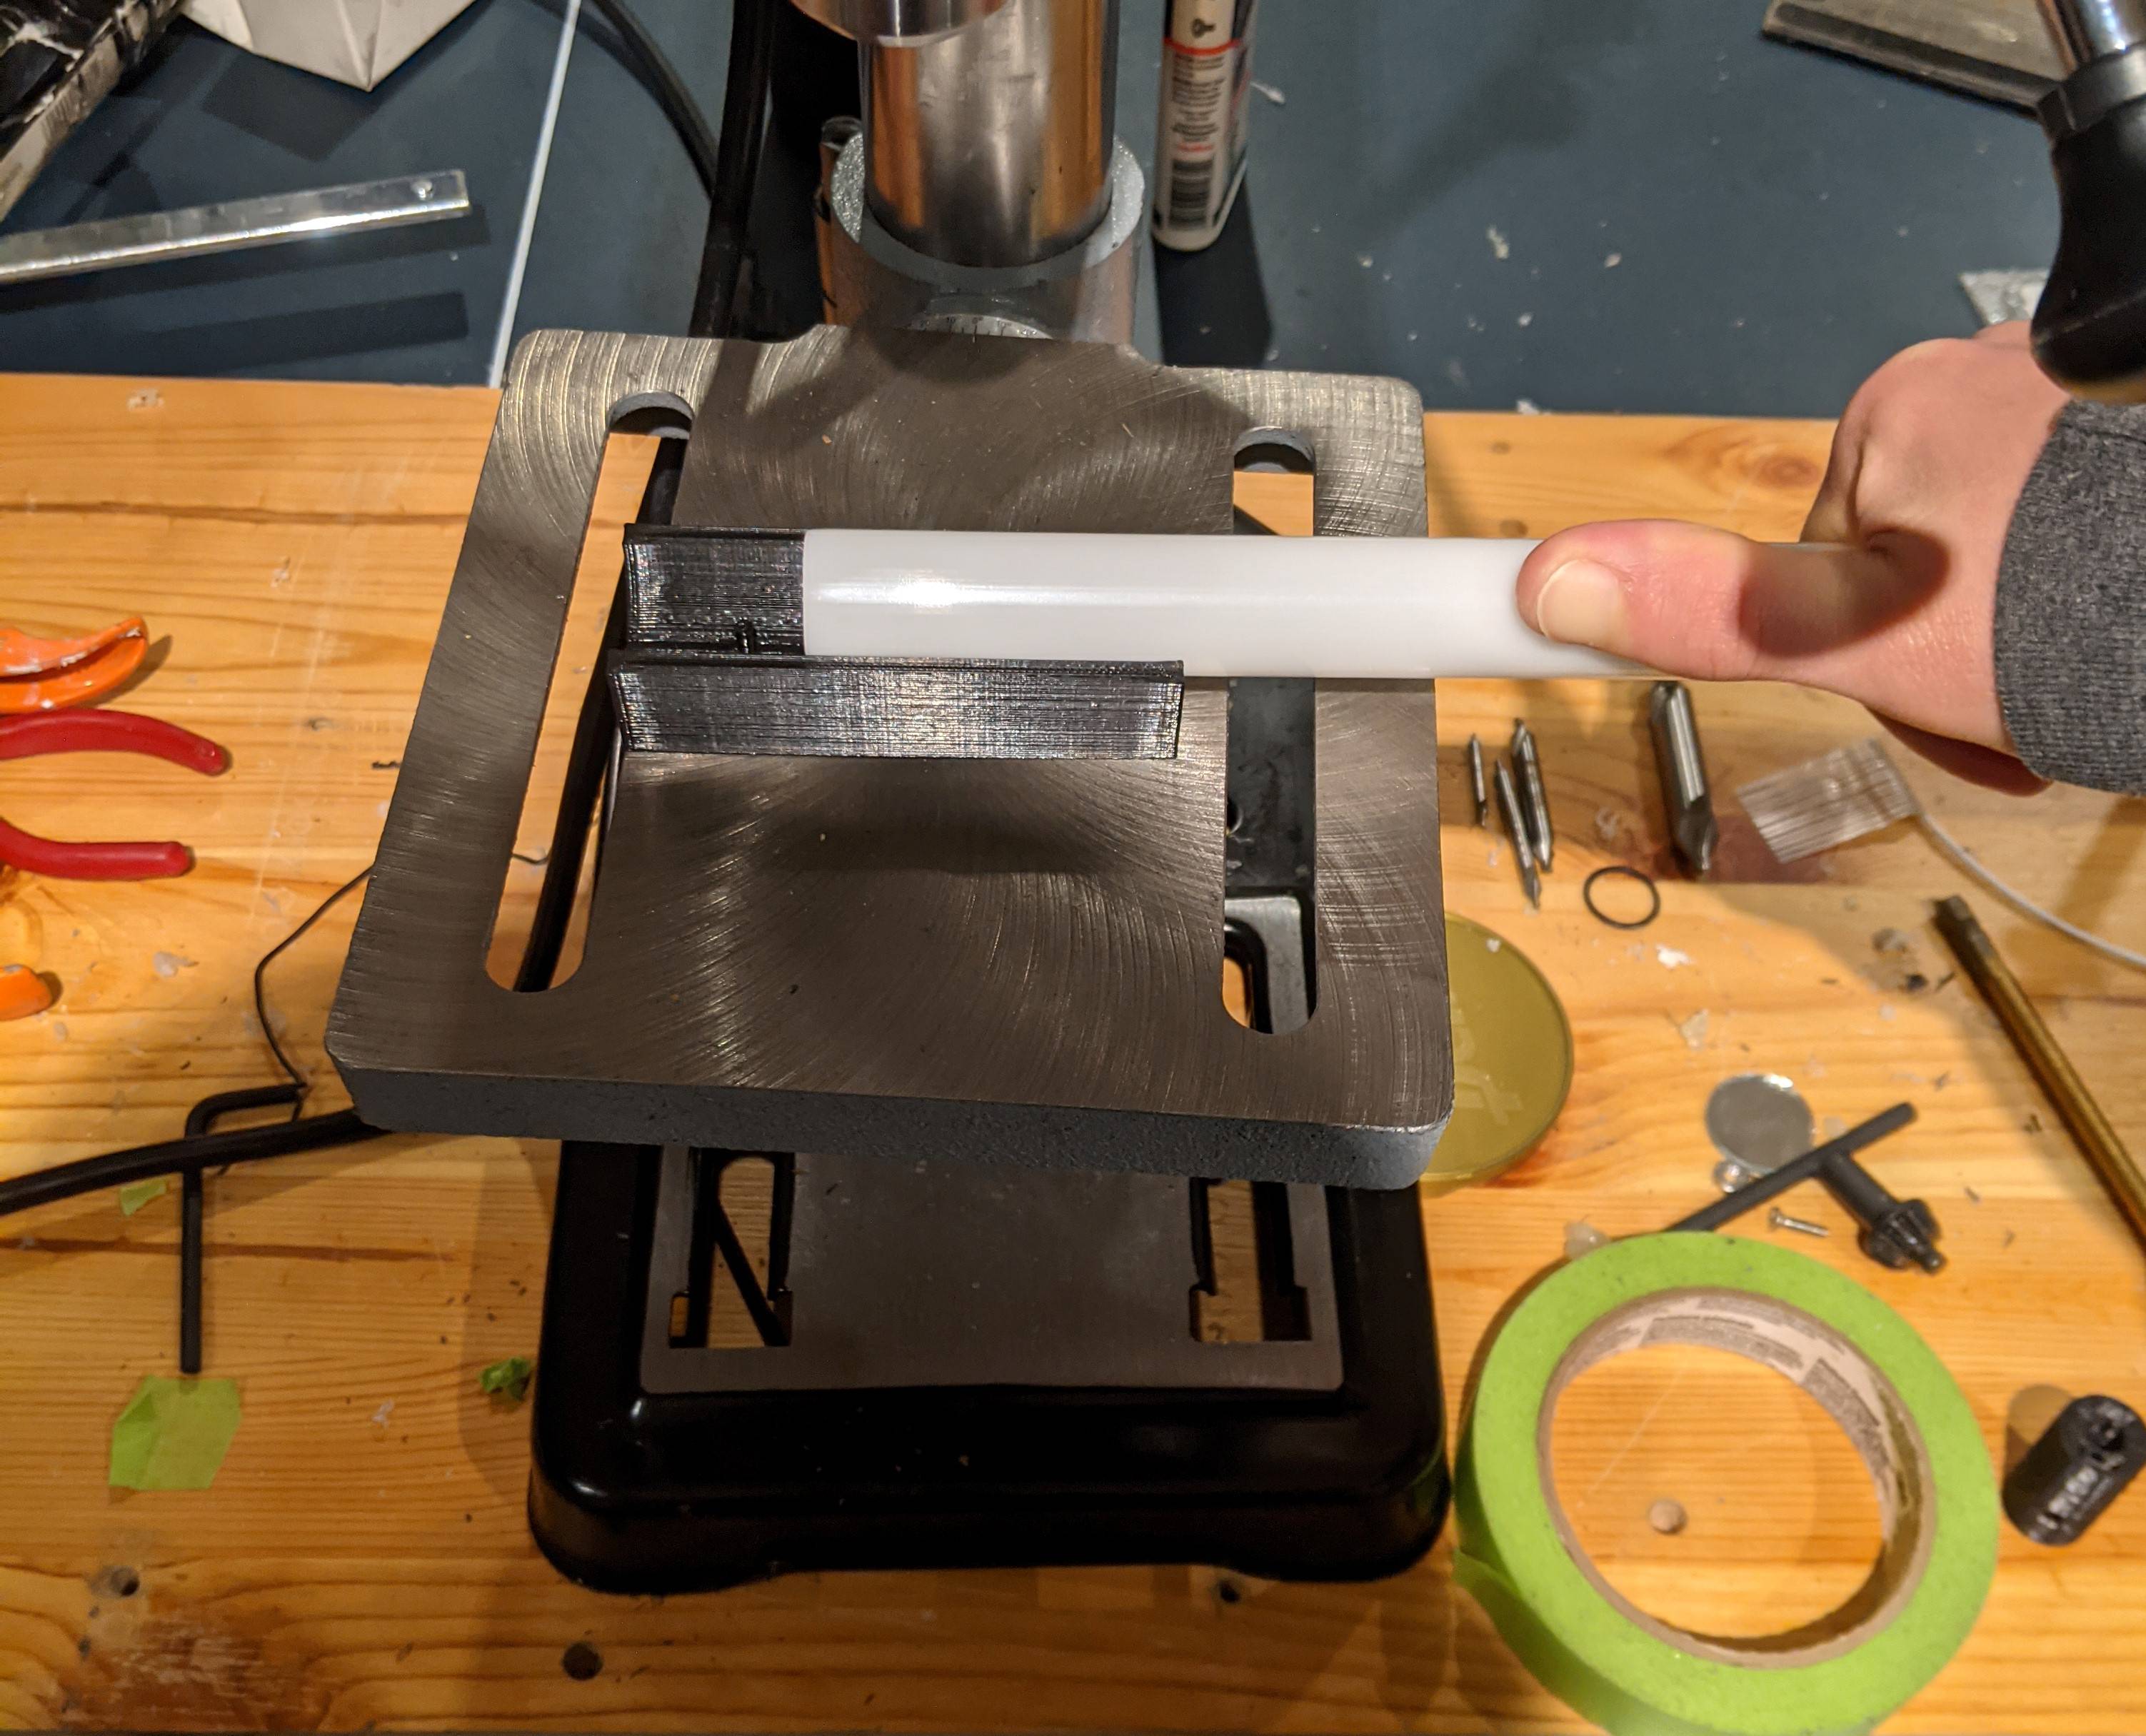
I had to drill >40 evenly spaced holes in these Delrin tubes. I quickly cadded and printed this jig to help, a peg goes into the previous hole you drilled, holding the piece in the correct position to drill the following hole. The jig secured to the drill press table via a peg into the 3/4" hole centered on the table below the chuck.
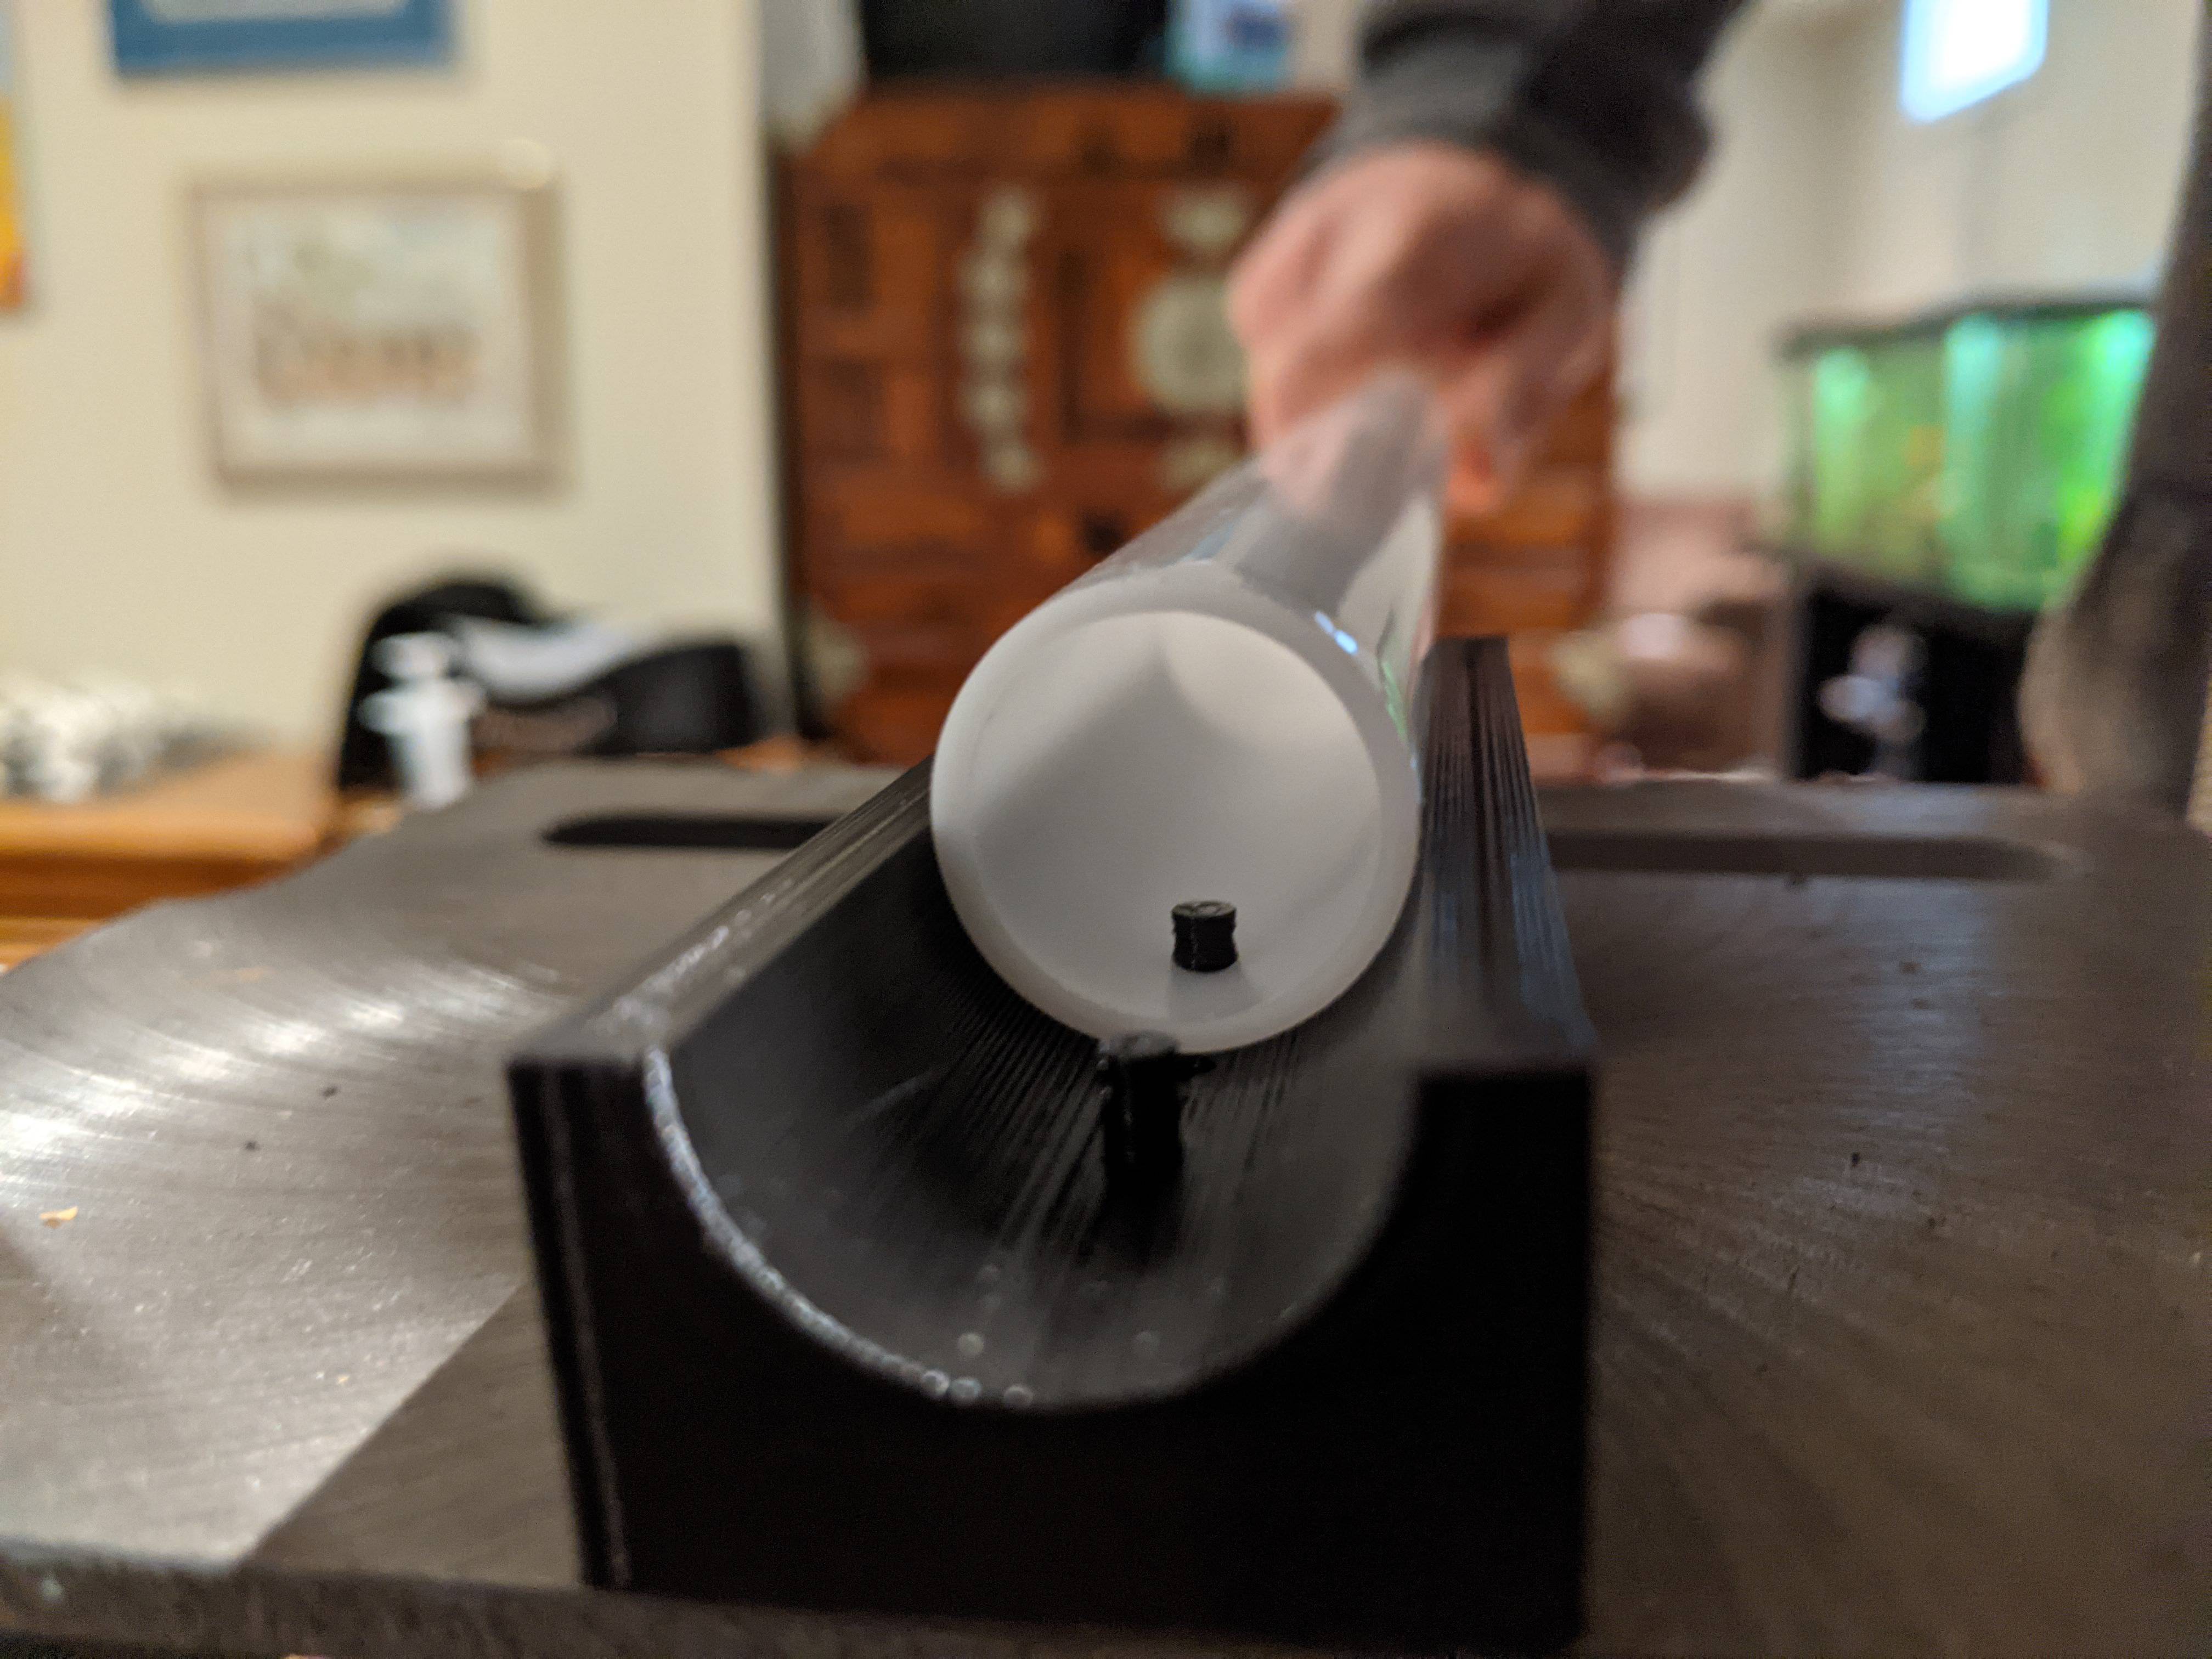
The jig in action! It improved the product and saved a ton of time.
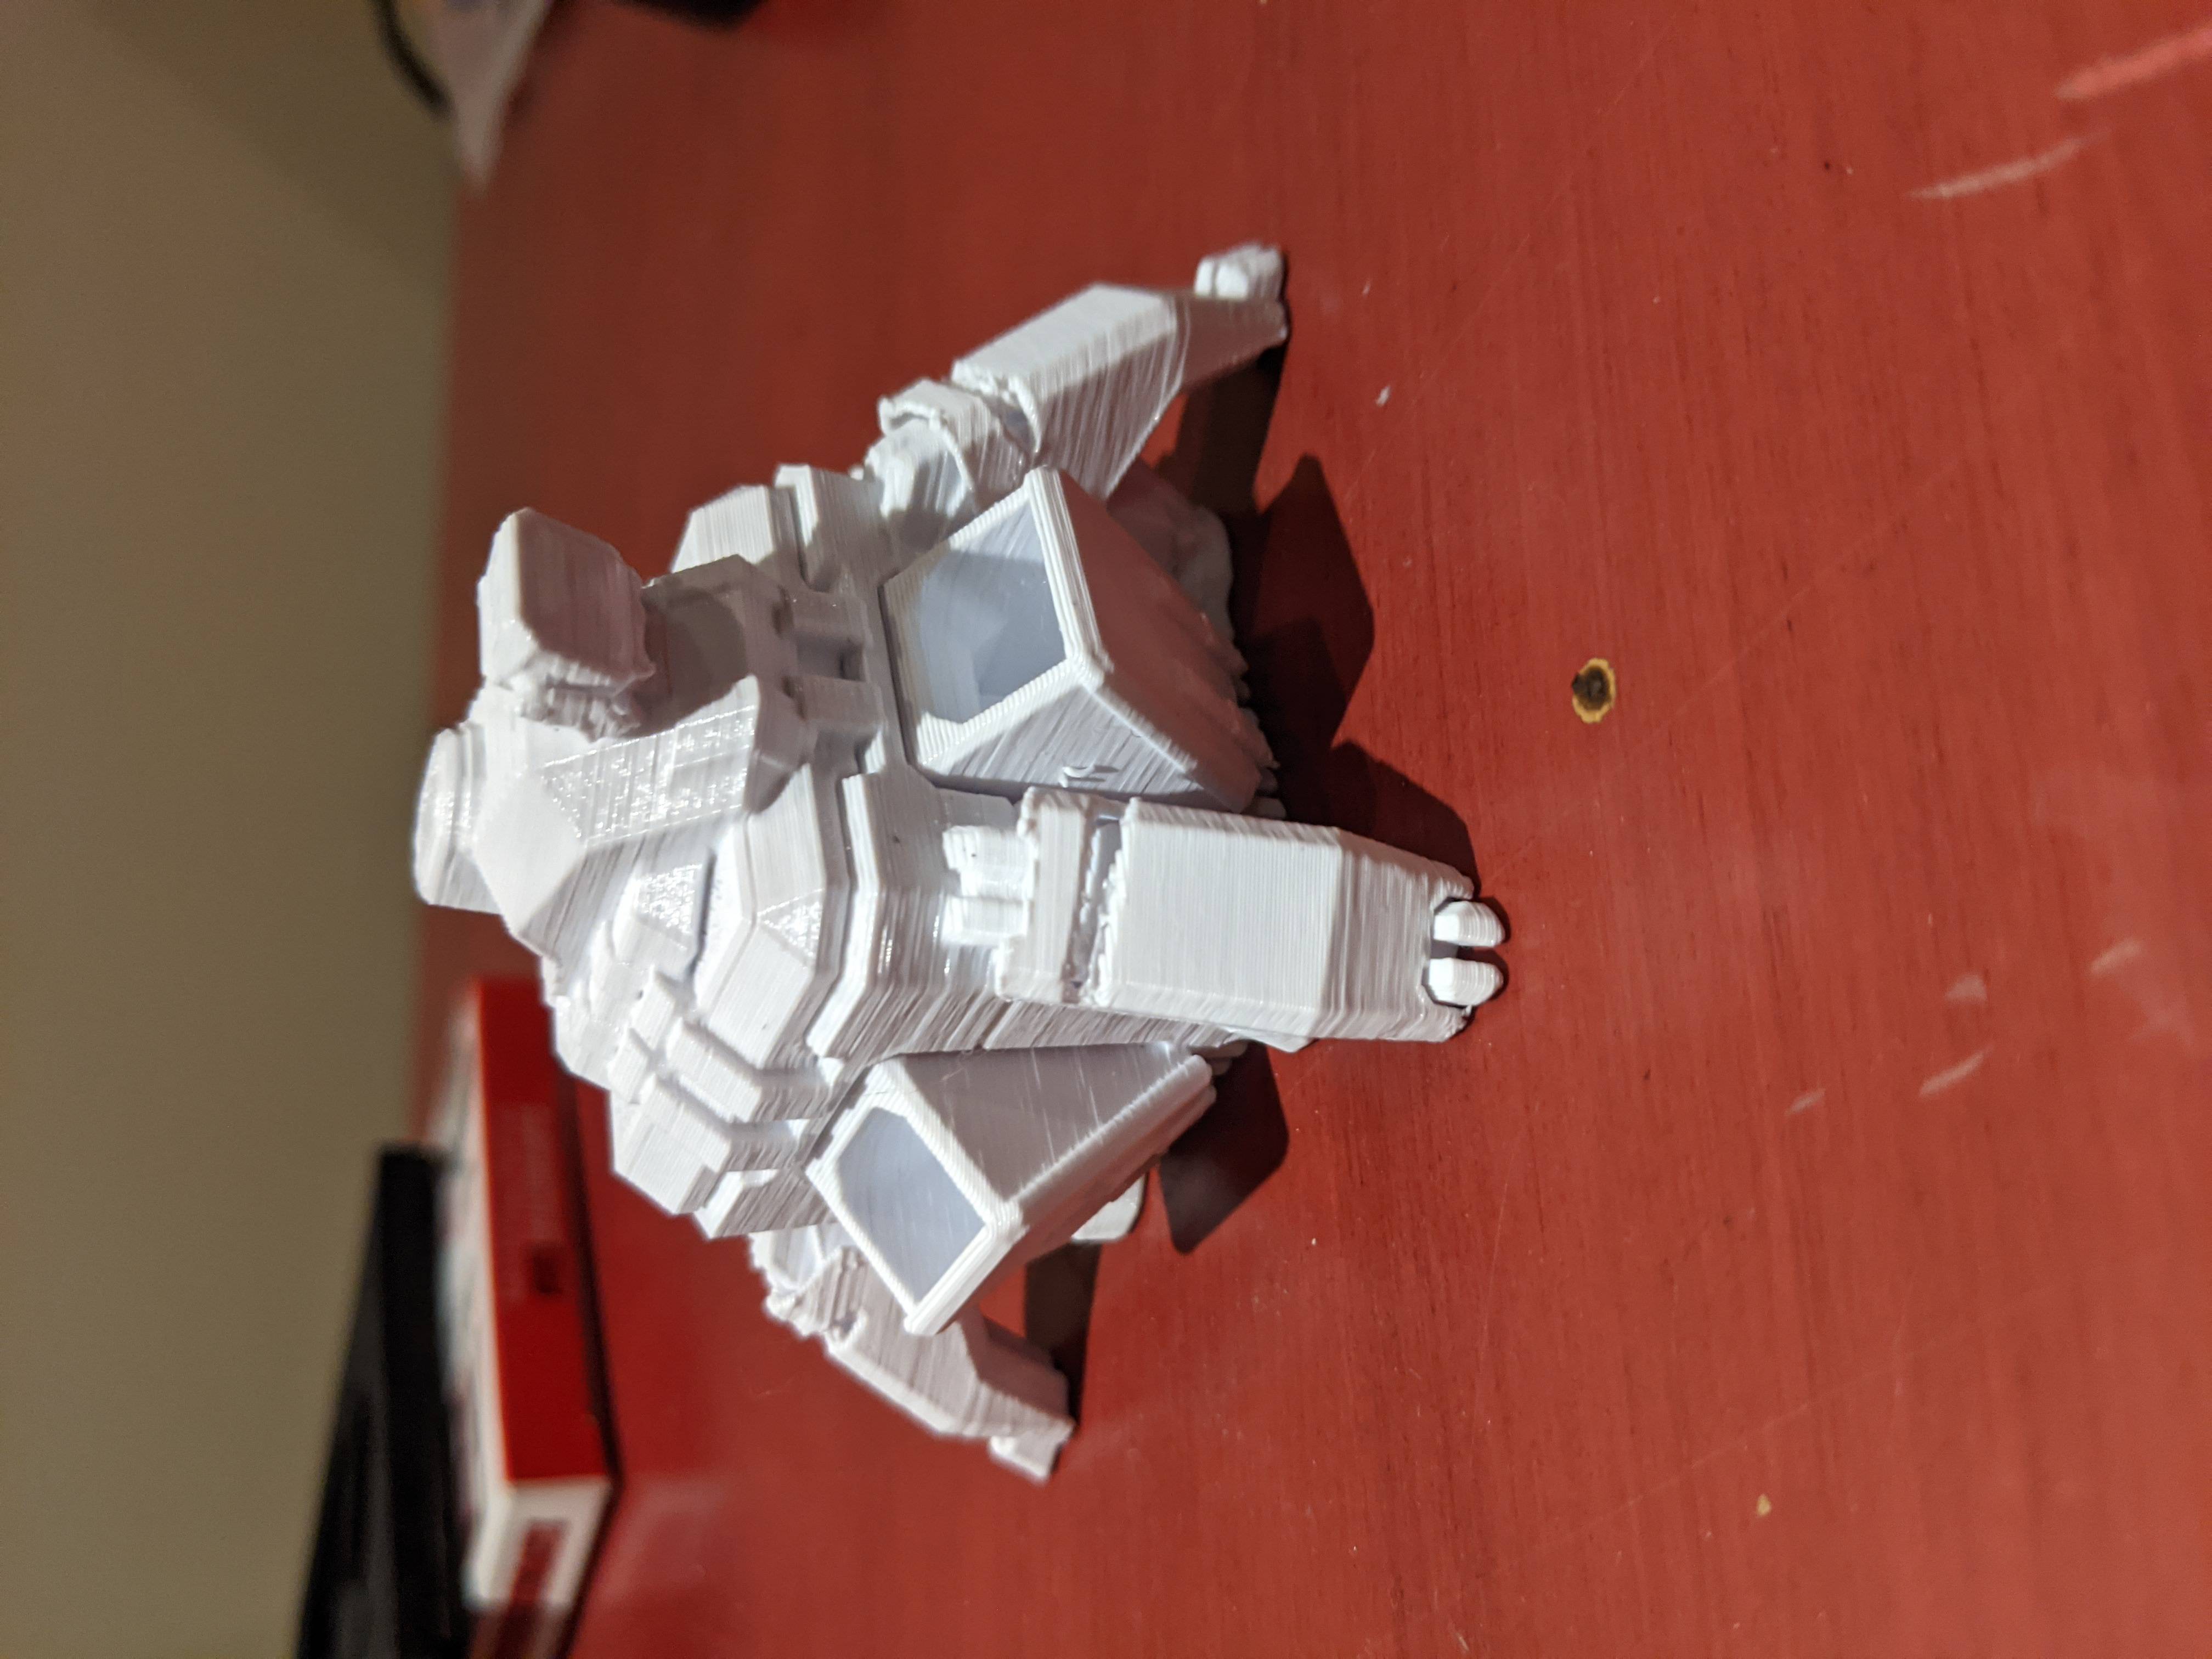
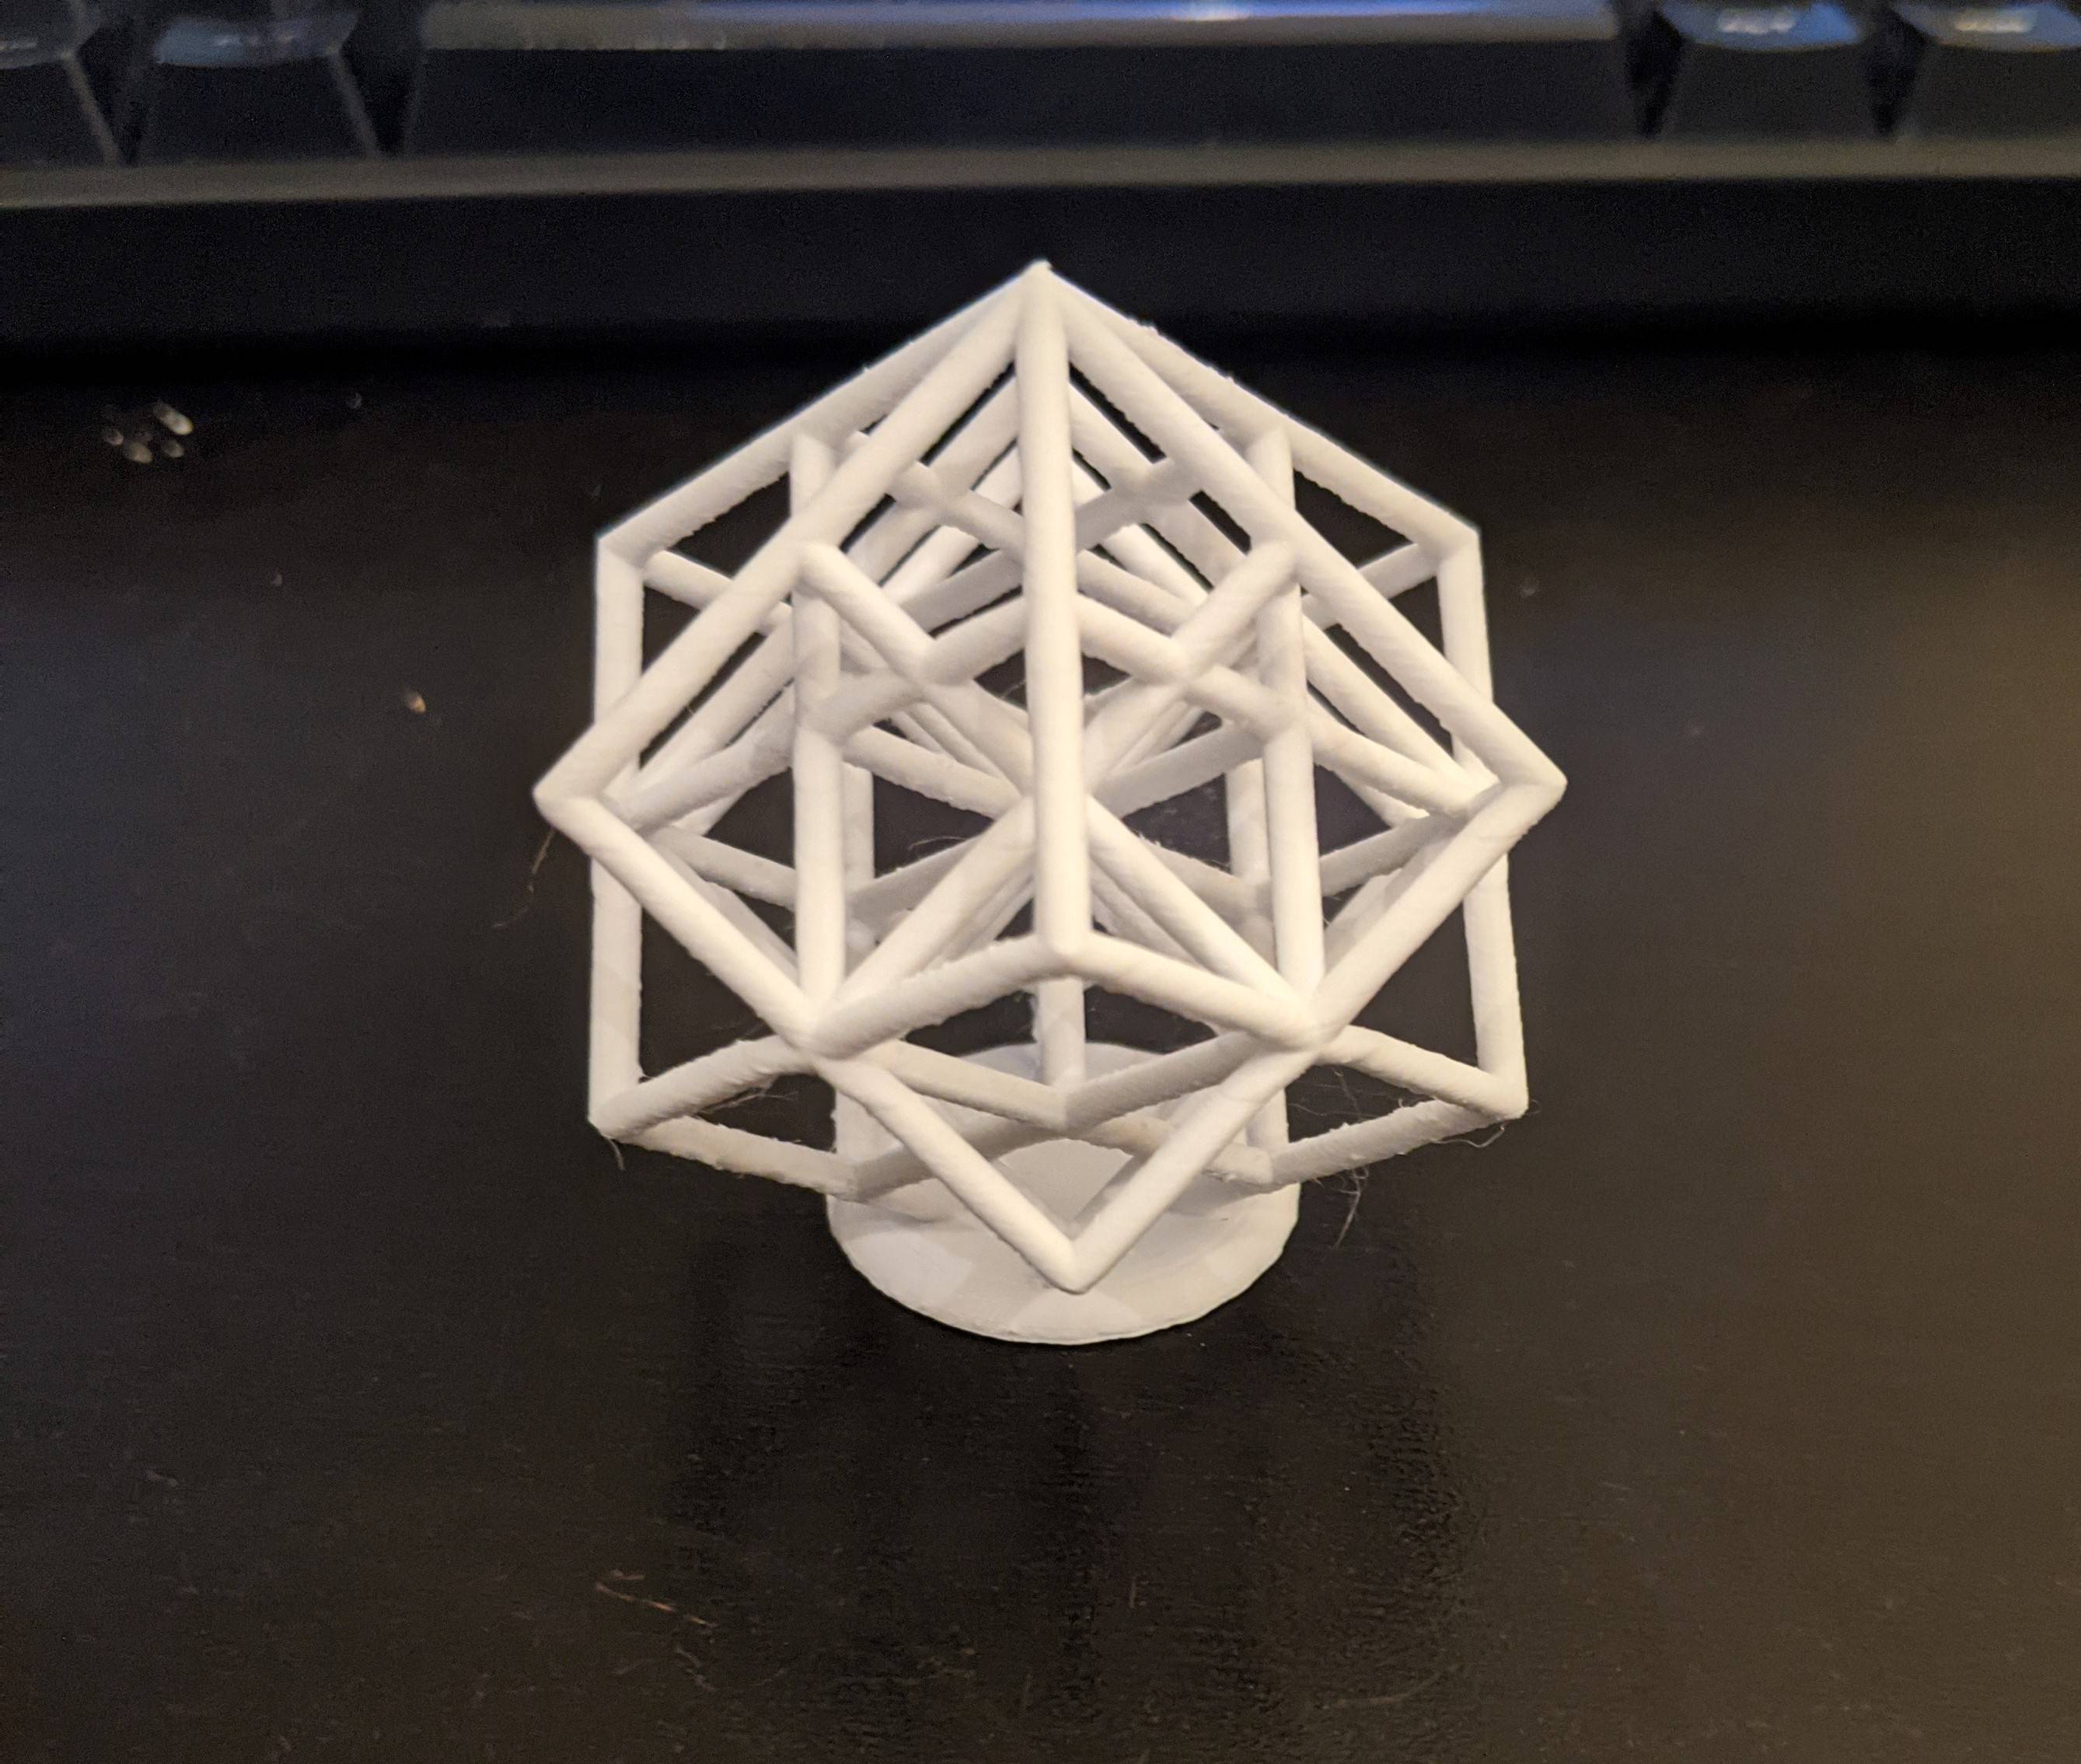
My most intricate decorative print to date, a model taken from a video game. I think it turned out very well, it took 12 hours to print because I set the layer height as small as possible and the model looks better for it.
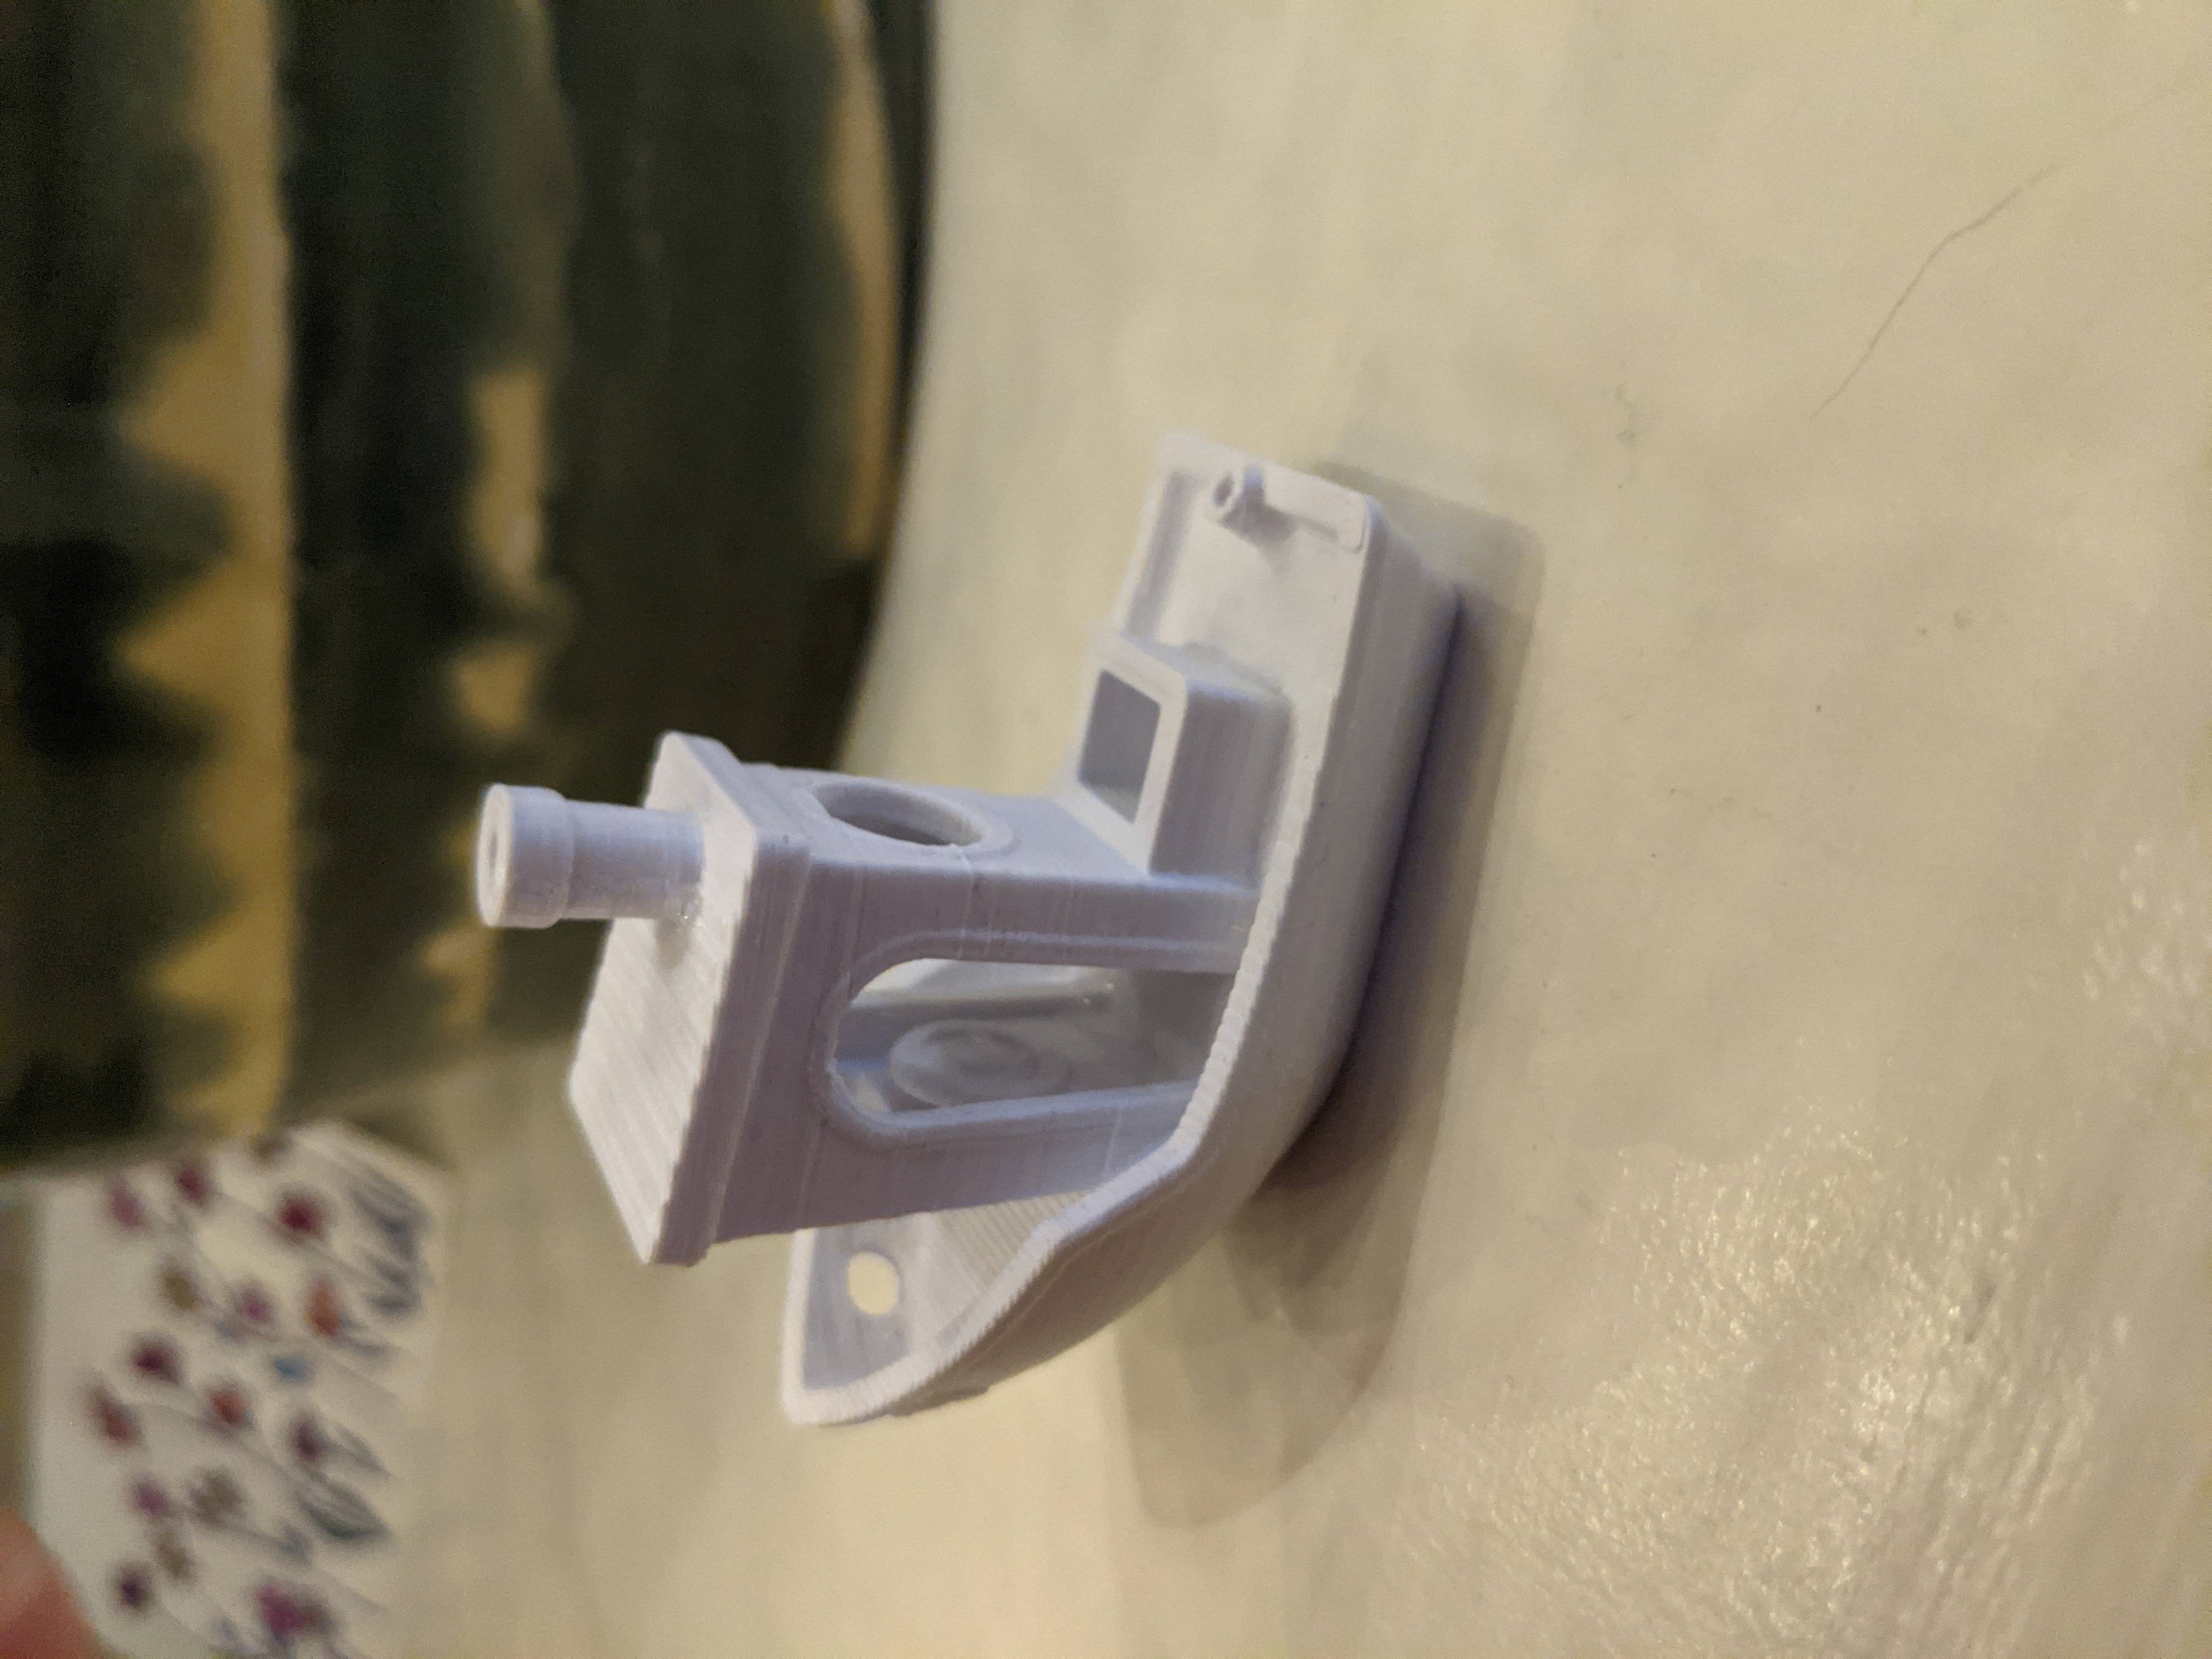
My first (sucessful) print, as per tradition, was a benchy boat. It turned out suprisingly well, but I still had to tune some settings afterwards. The prints prior to this had had issues with belt tensioning and layer adhesion, so I was very glad when this turned out!
The "torture cube" is a lattice cube designed to push the printer and settings to the limit. I had to tweak some of my usual settings to get this to work without supports. I ended up lowering the temperature too much in order to stop the many overhangs from collapsing, but this resulted in a less smooth finish than I would prefer. If I try it again, I'll try to make a nicer finish by raising temperature but dialing in fan and movement speed.
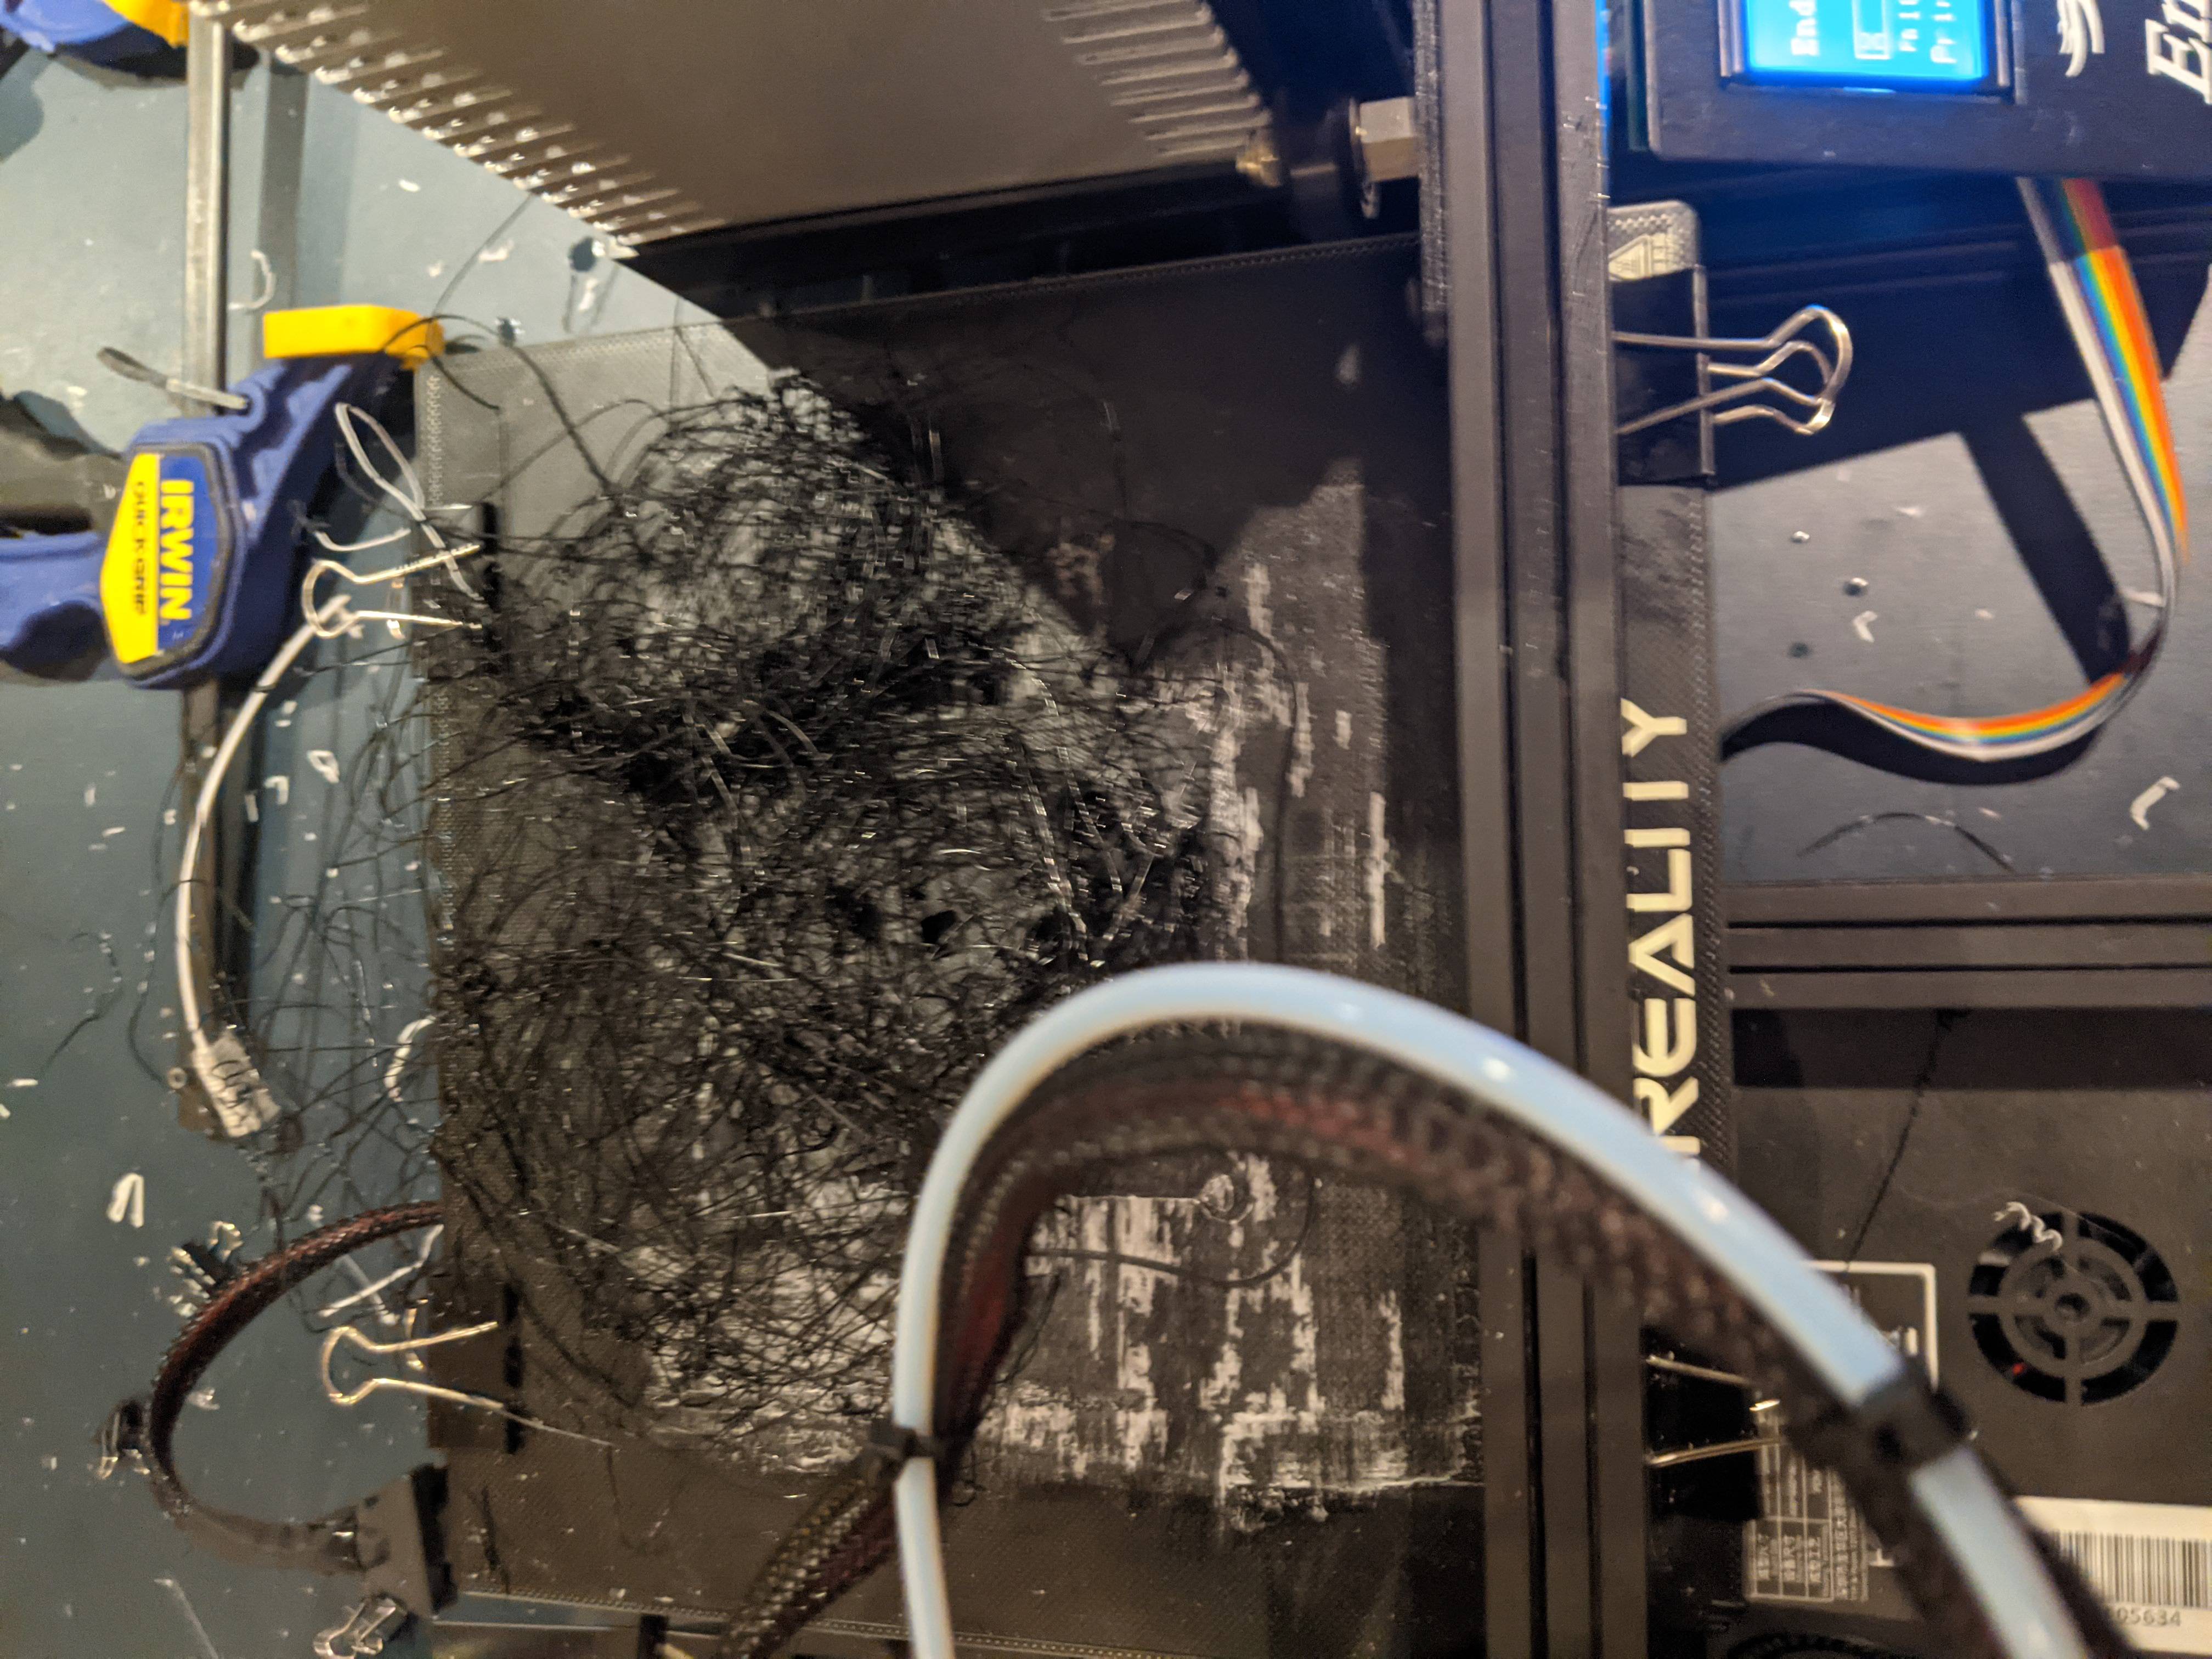
Sometimes things... don't work out. This was my biggest bed/layer adhesion issue to date; I was printing the Raspberry Pi case and as soon as I stopped watching it it pushed itself off of the bed and kept extruding onto the open air. I had been experimenting with using sugar water/simple syrup as a bed adhesive, and needless to say it didn't work out super well. I think the syrup I made was too dilute, so I intend to try this emthod again since I believe it will result in a flatter surface than the glue stick I currently use.

This is one of the most interesting issues I've come across so far. The bowden tubing connecting the extruder stepper to the hot end unscrewed itself, letting the filament be pulled off the roll but pushed into ait instead of to the extruder. This happened half way through a 6 hour print of a set of drawers and I didn't want to lose out on the filament already on the bed. To remedy this I took some measurements, went into Cura and cut the drawers off so that it would start printing at the correct layer, then I had to modify the G-code file to apply a Z-offset and move the hot end to the correct height.
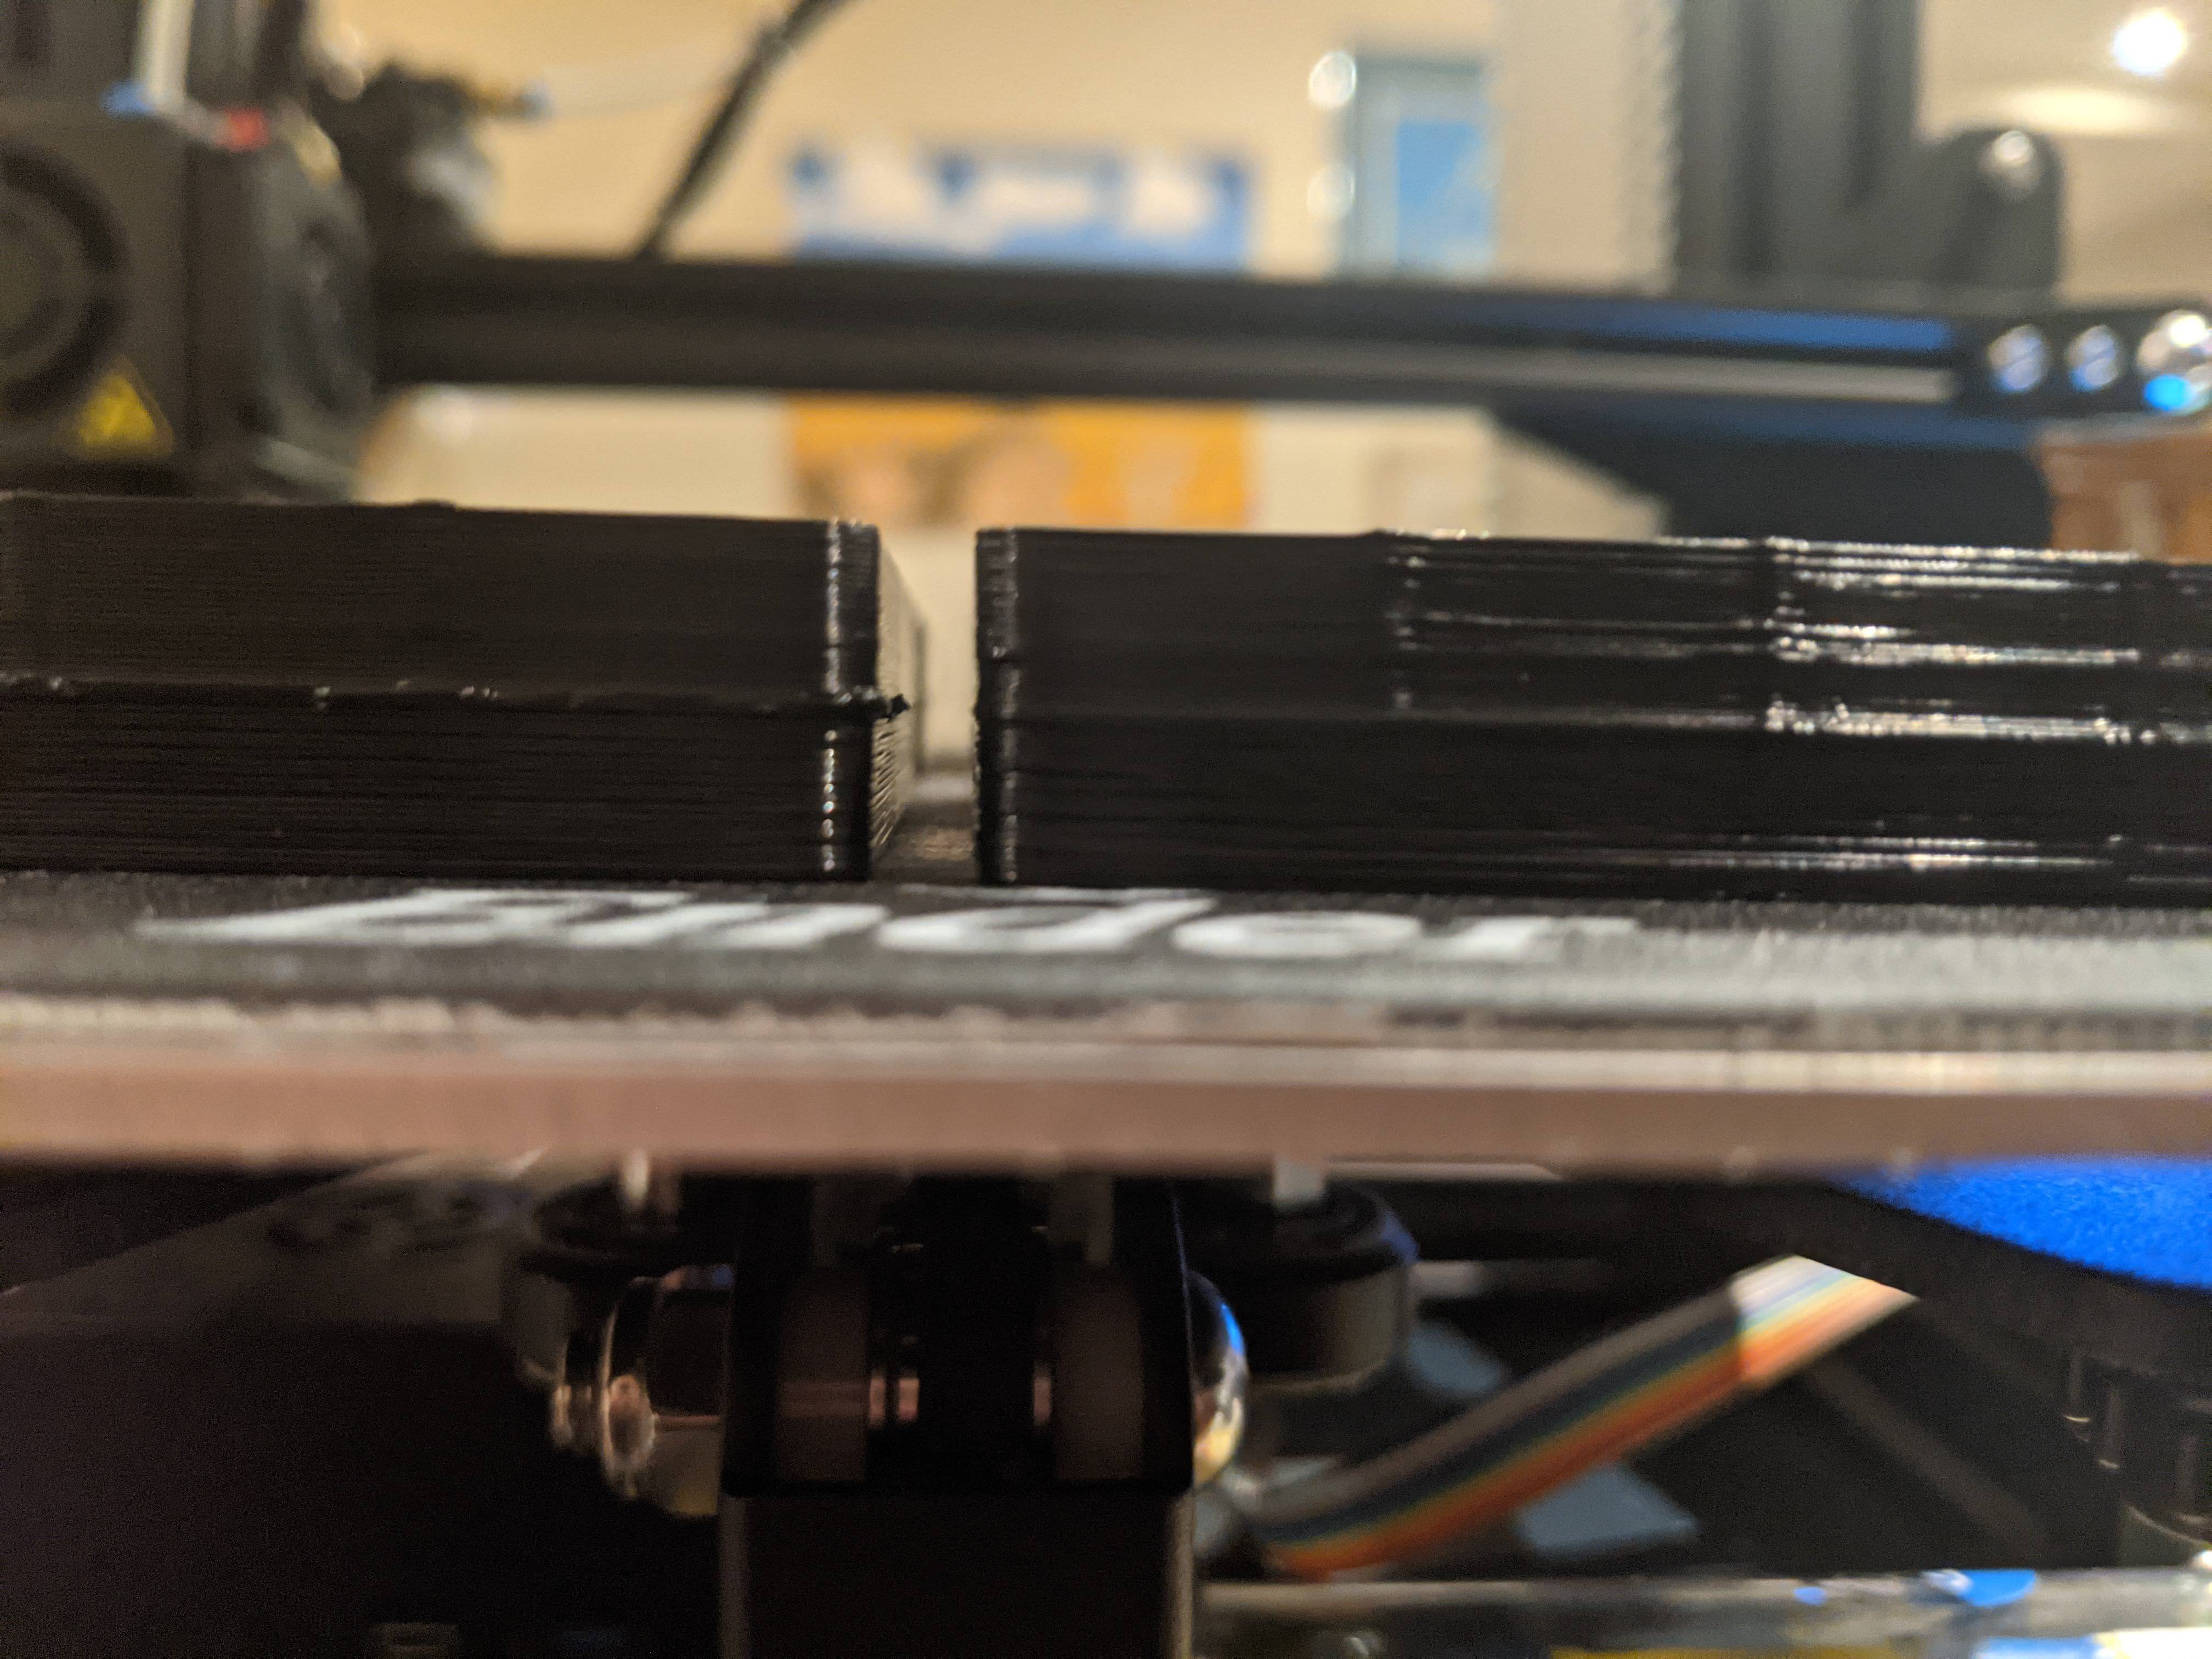
This is after the fix was applied, there is an imperfection in the drawers where the print sat on the bed for a long time and cooled off, but other than that the print was compelted successfully and I could sand the imperfection off of the drawers.